

Hello crafty friends! Welcome and thanks for dropping in!

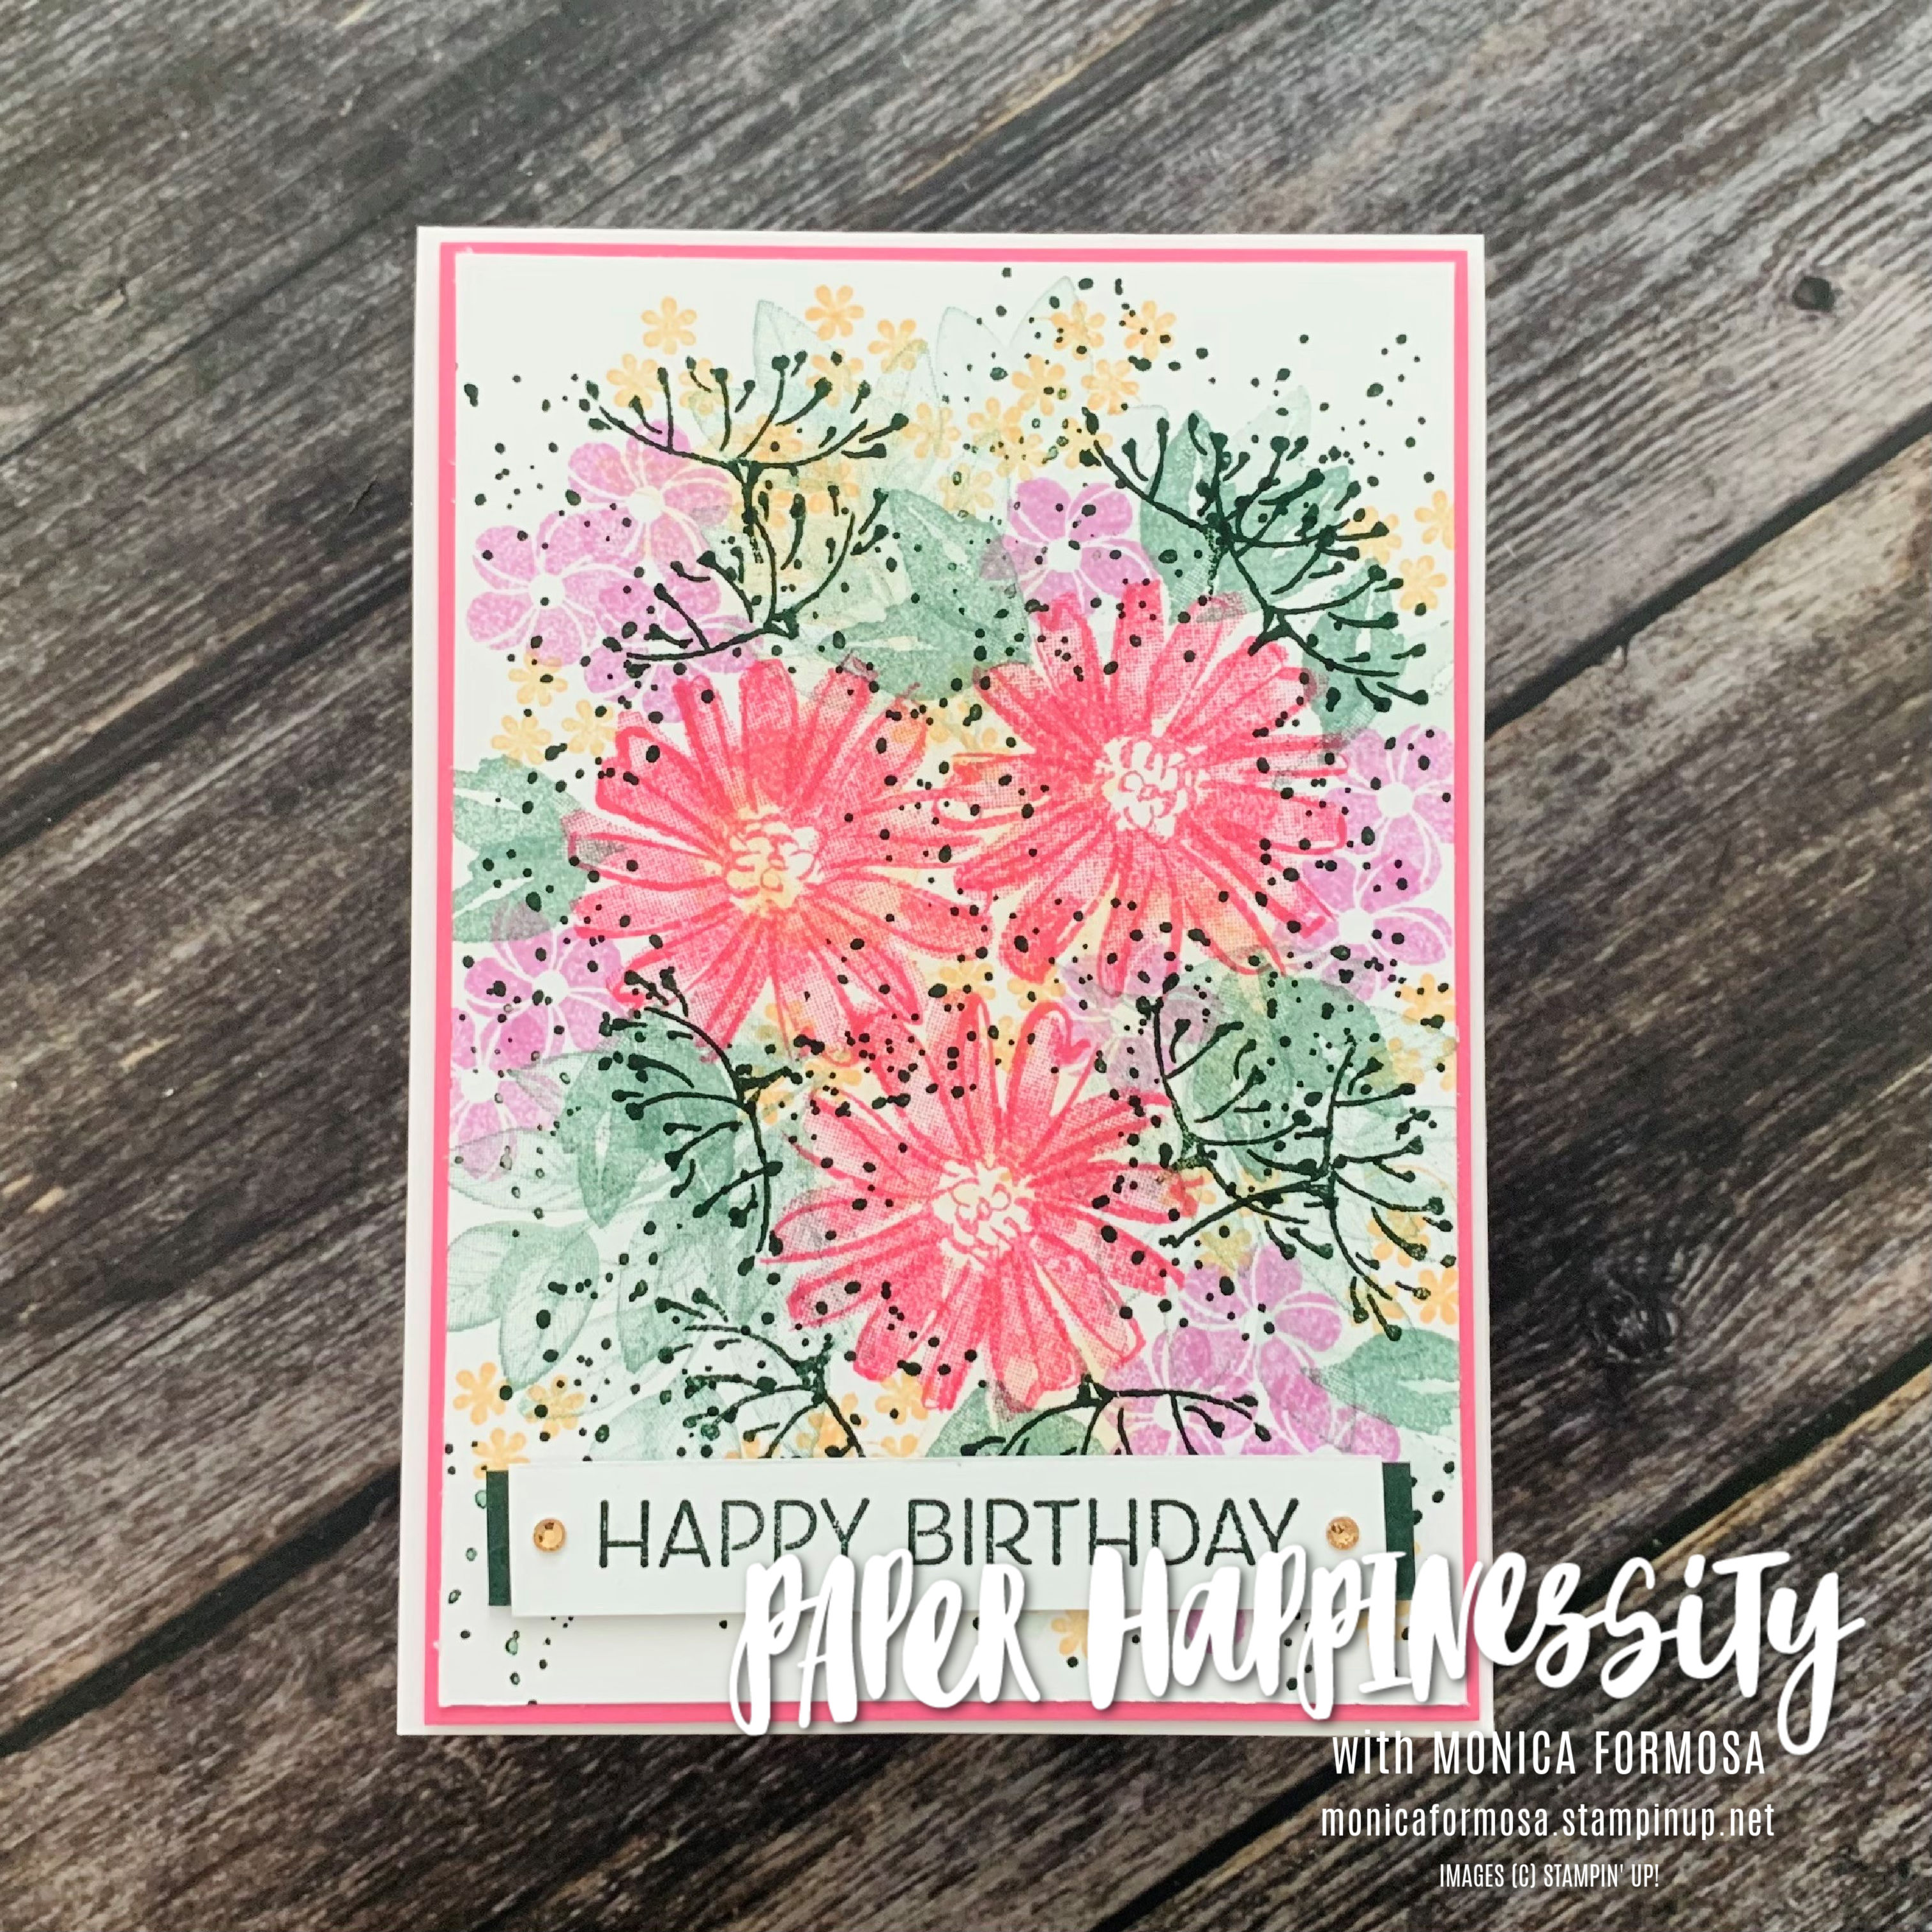
My project is quite product heavy as I've combined six different stamp sets- ideally you need three different sized floral images, a variety of foliage and a 'dottage' stamp. I really enjoy stamping this way and will normally stamp a full sheet of cardstock then trim them into card fronts a bit like one-sheet-wonders. For this project though, I only stamped this.
Supples:
- Stamp Sets: Artistically Inked (background and sentiment), Colour & Contour (large flowers), Forever Fern (foliage, dottage), Heavenly Hollyhocks (medium flowers), Hand-Penned Petals (foliage, flower stem), Full of Love (small flowers)
- Cardstock: Basic White Thick and regular, Polished Pink, Evening Evergreen
- Ink: 2021-2023 In Colours - Evening Evergreen, Soft Succulent, Pale Papaya, Polished Pink, Fresh Freesia
- Embellilshments: Champagne Rhinestones
- Trim a piece of Basic White Regular cardstock to a size that's slightly larger than your card front.
- Stamp the elongated watercolour image from Artistically Inked in 2nd generation Pale Papaya to provide a little texture and colour to your background. Don't stress too much about this step as it will be mostly covered and you could even not do this step.
- Depending on your preference, stamp either the detail or the fill-in floral image from Colour & Contour then swap to create a close cluster of three flowers in the centre using Polished Pink.
- Stamp one of the larger foliage stamps from Forever Fern in the 'valley' between each flower using 2nd generation Soft Succulent.
- Stamp the larger single flower from Heavenly Hollyhocks in Fresh Freesia around the outer edges of the larger pink flowers. Try and stamp in groups as room allows.
- Using full-strength Soft Succulent, stamp the larger leaf image from Hand-Penned Petals filling in the areas around the flowers. Don't be afraid to stamp over the existing images - this will create depth and dimension.
- Use the little trio of flowers from Full of Love and stamp these in Pale Papaya. You could substitute this stamp for the little group of four in Heavenly Hollyhocks.
- The floral stamp from Hand-Penned Petals was stamped in Evening Evergreen and I left off the lower section of the stem in most of my stamping.
- Lastly, add some 'dottage' again in Evening Evergreen using the image from Forever Fern.
- Trim this down and mat onto a piece of Polished Pink cardstock. I have a tiny 1/16" or 2mm border on all four sides.
- Attach this to your card base using Dimensionals. If posting, I would glue directly.
- Stamp your sentiment on a strip of Basic White and add a narrower strip of Evening Evergreen behind and attach with Dimensionals.
- Add a couple of Champagne Rhinestones either side for a little bit of sparkle.
- To finish off the inside, I've matted a piece of Basic White cardstock onto a piece of Polished Pink and glued it in. You could also add some stamping in one corner if you wanted to bring the design to the inside of your card.


 |
| You Tube: https://youtu.be/7TduamOn95Y |
Until next time, take care, stay safe and have a great day!
Monica xx
If you live in Australia and would like to purchase any of the products I've used today, click any of the thumbnail links in the Product List below or click the 'Shop Online' tab at the top of this page. Both ways will get you directly to my Online Store, where you are only minutes away from getting products delivered straight to your door.
Or maybe you have a wish list as long as your arm? If so, the best deal in the catalogue is to join my Stamping Queens Stamping Team.
You can put together a Starter Kit with your choice of products to the value of $235.00 for only $169.00 with a 20% discount every time you place an order! No conditions attached! The added bonus is that you might like to start your own little stamping business.


")

")
")


No comments:
Post a Comment
Thanks for taking the time to comment - it is really appreciated!