Hello crafty friends! And thanks for popping in!
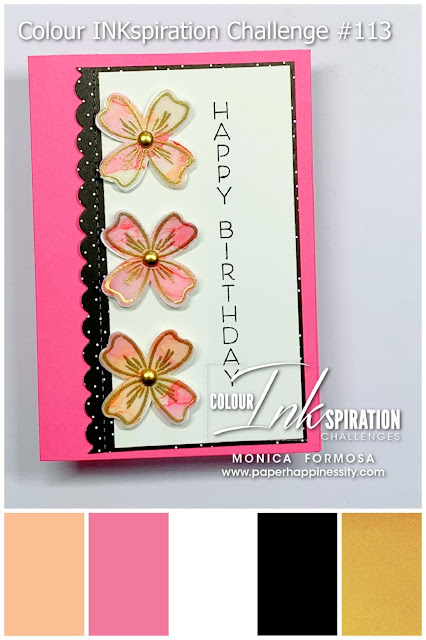
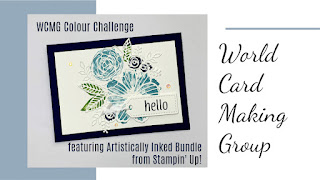
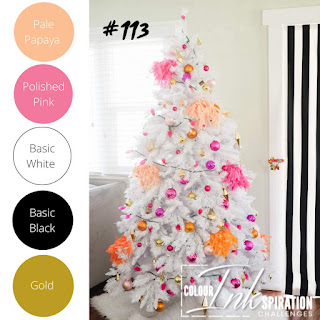
Welcome back for Colour INKspirations Challenge #112. The photo for this challenge was picked by fellow Crew Member, Lou Kitzelman and this Challenge we give a big warm welcome to our newest Crew Member, Michele Miller!
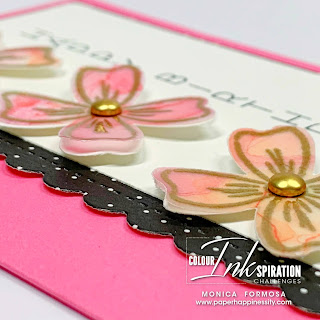
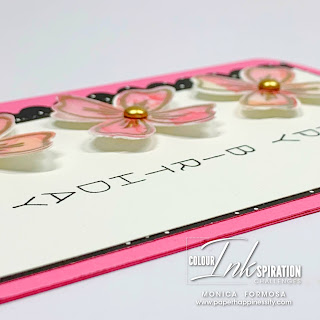
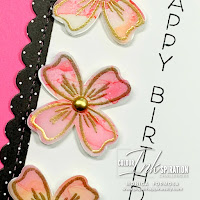
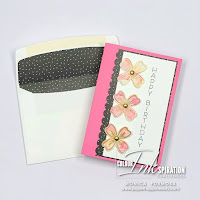
My card for this challenge was quickly pulled together as things are still quite busy in my craft room. I wanted to use the Challenge Colours for something other than Christmas and even though I absolutely love using non-traditional colours for Christmas, my brain totally rebelled and so I've created this sweet little Birthday Card that is Note Card size. This is a great size for attaching to a bunch of flowers or including a gift card inside. It features the Flowers Of Friendship Bundle together with the Celebrate With Flowers Stamp Set and I've also pulled in the scallop edgelit die from Penned Flowers Dies. You could easily not do this step and leave a straight edge if you don't have this in your craft collection. I have used Stampin' Blends with alcohol for my colouring and did a little heat embossing with gold on the flowers. I could easily make quite a few more cards as I have heaps of coloured Vellum left over. For the embellishments, I've used the gold sequins from the Brushed Metallic Adhesive Backed Dots - they were a perfect fit!
Supplies Needed:- Bundles: Flowers Of Friendship
- Stamp Set: Celebrate with Flowers (sentiment)
- Dies: Penned Flowers
- Cardstock: Polished Pink, Basic White, Vellum
- Designer Series Paper (DSP): Pattern Party - Host Reward
- Stampin' Blends: Polished Pink Combo (dark), Pale Papaya Combo (dark)
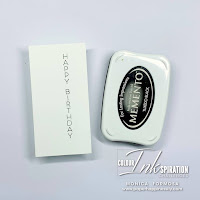
- Inks: VersaMark. Memento Tuxedo Black
- Stampin' Emboss Powders - Metallics (Gold)
- Embellisments: Brushed Metallic Adhesive Backed Dots
- Adhesives: Tombow Multipurpose glue, Dimensionals
- Tools: Paper Trimmer, Stamparatus, Mini Stamin' Cut & Emboss Machine, Heat Tool.
- Other: Isopropyl alchohol. I used Diggers brand which is 100% and can be purchased from Office Works or Bunnings for those in Australia. You definitely need at least 95% for this technique to be successful.
Card Construction:
For this project you will need:
Polished Pink card base measuring 7" x 5" and scored at 3 1/2" on long side to create a Note Card.
A piece of DSP measuring 2 3/4" x 4 3/4".
A piece of Basic White cardsstock measuring 2 3/8" x 4 5/8"
A piece of Vellum for colouring large enough for three flowers.
A piece of Basic White cardstock large enough for three flowers.
Using both the dark pens from the Polished Pink and Pale Papaya Stamp Blends Combos, colour the piece of Vellum using isopropyl alchohol and a heat tool to create a pattern you are happy with.
Stamp the larger floral image from Flowers Of Friendship stamp set on the reverse side in VersaMark and hear emboss using gold powder.
TIP: When heat embossing Vellum, allow your heat tool to warm up before applying it to the powder and keep moving the heat tool over the area. Don't stay in one spot too long as you will warp the Vellum.
Punch out the flowers using the co-ordinating Flowers & Leaves punch.
Also punch out three flowers from Basic White and glue these under the Vellum flowers with Tombow Multipurpose Glue.
Stamp the Happy Birthday sentiment in Mememto Tuxedo Black ink over towards the right side of the piece of Basic White cardstock.I used my Stamparatus to get perfect placement.
Use the scallop edgelit die from Penned Flowers to create a scalloped edge on the piece of DSP and glue this under the Basic White cardstock piece stamped with the sentiment.
Glue this to the right hand side of the card front.
Attach the flowers with Dimensionals and add a larged gold Brushed Metallic Adhesived Backed Dot. These are super easy to attach as they come with adhesive already applied and ready to go.
To create a little bit of extra elegance, I trimmed down a scrap of DSP and glued it to the inside of the envelope.
Feel INKspired to join the challenge?
I would love for you to join in our colour challenges. It's a great way
to take yourself out of your comfort zone and use different colours!
Firstly, get some INKspiration by checking out all of the
creations of the Colour INKspiration Crew in the challenge album on our
Facebook page. Then you have 12 days from today to make and upload your creation to the Facebook Colour INKspiration Group.
You don't have to have a blog to participate but if you do you can link
back to your post. Just a reminder to use all of the challenge colours. You
can also use neutrals such as Whisper White, Very Vanilla, Crumb Cake,
Sahara Sand and Basic Black as well as Metallics.
Not a member of the Colour INKspiration Facebook group yet? Just click here and ask to join Colour INKspiration,
add the group to your favourites and share it with your crafty friends
so they can join in the fun too. We can't wait to see what you create
with these gorgeous colours.
Thank
you so much taking the time to drop in. I hope I have inspired you and if you like what I have shown
or if you have any questions, please leave them in the comments section
below.
Take care, stay safe and have a great day!
Monica xx
.
To purchase any of the products I've used today you can click any of the direct links in the Product List below or click the
'Shop Online' tab at the top of this page. Both ways will get you
directly to my online store, where you are only minutes away from
getting products delivered straight to your door.
Or
maybe you have
a wish list as long as your arm? If so, the best deal in the catalogue
is to
join my Stamping Queens Stamping Team. Until the end of November, you'll
get the $169.00 Starter Kit - filled with your pick of products to the
value of $235.00 - for only $130.00 with a 20% discount every time you place an order!
.
Product List
Live In Australia? Shop With Me!

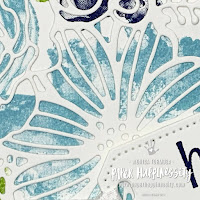


 Die cut the large detailed floral die from the Artistic Dies in Basic White.
 Using the die cut as a guide, stamp the large floral/splatter image and the second to largest floral image in Balmy Blue ink.
 Using the die cut as a guide, stamp the smaller flowers in Night of Navy ink.
 Using the die cut as a guide, stamp both leaf images in Granny Apple Green ink.
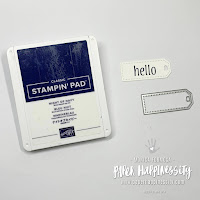


")


 Crinkled Seam Binding Ribbon")


")
")


 Host Designer Series Paper")


