24 August 2022

Colour INKspiration Challenge #128 feat. Splendid Thoughts Bundle


Hello and welcome my crafty friends!  Thanks for popping in and checking out my latest Blog Post.
 
Today I am sharing my project for Colour INKspiration Challenge #128 which features the colours So Saffron, Petal Pink, Blushing Bride and Tahitian Tide.  The inspiration photo for this Challenge was chosen by our illustrious Crew Member, Lou Kitzelman.
 

My card features the Splended Thoughts Bundle because leaves don't always have to be green! I've also brought in the Stylish Shapes Dies for the greeting.  For a splash of pizzazz, I've added an Open Leaf Trinket, a little Linen Thread and some In Color Matte Deocrative Dots in Tahitian Tide.  The lovely texture in the background was created using the Hive 3D Embossing Folder and little bit of ink-splatter.  I really enjoyed colouring the stamped images and realised I should be doing more of this in my cardmaking.
 

 Supplies Needed:
  • Bundle:  Splended Thoughts
  • Dies:  Stylish Shapes
  • Cardstock:  Basic White, Shimmery White, Petal Pink, So Saffron,Tahitian Tide
  • Ink:  Tahitian Tide, Blushing Bride, So Saffron
  • Embellishments:  Linen Thread, Open Leaf Trinkets, 2022-24 In Colour Matte Decorative Dots
  • Colouring Accessories:  Blender Pen, Water Painters
  • Tools:  Paper Trimmer, Stampin'Cut & Emboss Machine
  • Adhesives:  Tombow Liquid Glue, Mini Glue Dots, Dimensionals
 
Let's Make It:
 
For this card you will need the following cardstock:
  • A Tahitian Tide card base
  • 2 pieces of Basic White 1/8" smaller on two sides than the card front (to give a small 1/16"border on all four sides)
  • Shimmery White to stamp the images on
  • Petal Pink and So Saffron for the die-cuts
  • A scrap of Basic White for the sentiment

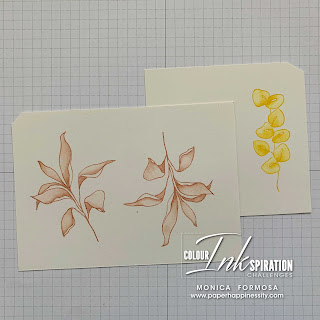
  • Stamp two Blushing Bride images and one So Saffron image onto Shimmery White cs and colour very gently using a Blender Pen and the co-ordinating ink. WARNING:  This cardstock will pill if you overwork the colouring. Die cut using the co-ordinating dies from Splendid Stems Dies.
  • Die-cut the other elements in So Saffron and Petal Pink cs.

  • Run one piece of the Basic White cs through the Stampin' Cut & Emboss Machine using the Hive 3D EF then splatter with Tahitian Tide ink using a Water Painter. Attach this to the front of the card with Tombow Liquid Glue.
  • Arrange the elements towards the top of the card gluing down with Tombow or Mini Glue Dots.  Add a double bow made from Linen Thread and a Open Leaf Trinket.
  • Stamp the greeting and die-cut using the shorter-but-wider banner in the Stylish Shapes Dies.  Attach with Dimensionals over the area where all the elements are meeting.
  • Add some of the Tahitian Tide In Colour Matte Decorative Dotts to finish off the front.
  • On the second piece of Basic White cs, stamp in the bottom right corner in  So-Saffron using first and second generation stamping.  Glue this into the centre of the card.


Feel INKspired to join the challenge? I would love for you to join us! It's a great way to have fun with different colours! 

Firstly, hop on over and check out the creations of the Colour INKspiration Crew in the Challenge album on our Facebook page. Then you have 12 days from today to make and upload your creation to the Facebook Colour INKspiration Group. You don't have to have a blog to participate but if you do, you can link back to your post. Just a reminder to use all the challenge colours. Neutrals such as Whisper White, Very Vanilla, Crumb Cake, Sahara Sand and Basic Black are also allowed as well as Metallics. 

If you feel inspired, click here and ask to join Colour INKspiration, add the group to your Favourites and share it with your crafty friends so they can join in the fun too. We can't wait to see what you create with these gorgeous colours! 

Thank you so much taking the time to drop in. I hope I have inspired you and if you like what I have shown or if you have any questions, please leave them in the comments section below.   

Until next time, take care, stay safe and have a great day!  

Monica xx

.


To purchase any of the products I've used today, you can click any of the direct links in the Product List below or click the 'Shop Online' tab at the top of this page.  Both ways will get you directly to my online store, where you are only minutes away from getting products delivered straight to your door.


Or maybe you have a wish list as long as your arm? If so, the best deal in the catalogue is to join my Stamping Queens Stamping Team. Fill your Starter Kit with your choice of products to the value of $235.00 for only $169.00 with a 20% discount every time you place an order! No risk attached!


 .
Product List 


10 August 2022

Colour INKspirtion Challenge #127 featuring a DIY Background


 Hi there my crafty friends!  Welcome and thank you for popping in!
 
 It's time for another Colour INKspiration Challenge and I was a little more excited to work with the Challenge colours this time around.  The inspiration photo was chosen by fellow Crew Member, Bronwyn and I can't wait to go and see what the Team have all created.

 
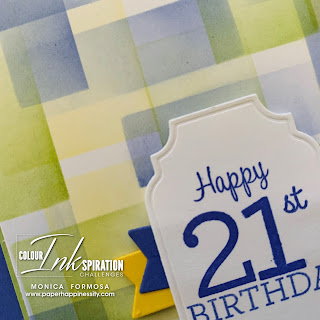
My card features All That Dies and I've created my own background using the Challege colours.  I've also pulled out a retired stamp set called Family Party as there's a 21st Birthday in the family this week and it such a great stamp set to use for all those special milestone birthdays that come around.
 

 Supplies Needed:
  • Stamp Set:  Family Party (retired) or similar
  • Dies:  All That Dies
  • Cardstock:  Orchid Oasis, Pear Pizzazz, Basic White, Window Sheets (or similar)
  • Inks:  Daffodil Delight, Orchid Oasis, Pear Pizzazz
  • Tools:  Paper Trimmer, Stamparatus, Mini Stampin' Cut & Emboss Machine, Blending Brushes
  • Adhesives:  Tombow Liquid Glue, Dimensionals.
Let's Make It:
  • For this card you will need a card base in Orchid Oasis cs, a Pear Pizzazz cs mat layer 1/2" smaller on two sides than the card front, a piece of Basic White measuring the same as the card front for your background (to be trimmed down), a second piece of Basic White for the inside measuring 1/8" less on two sides than the card front, a scrap of Basic White for the label, and a scrap of Daffodil Delight and Orchid Oasis cs for the flags.
  • I cut three different sized rectangles in pieces of Window Sheet (or similar) to provide stencils for my blending.   The shorter sides of each rectangle measure approximately 5/8", 1" and 1 1/2" and need to be about 2 1/2" long - this allows plenty of space to blend out the colour.
  • Using the stencils, I've blended the three Challenge colours onto the larger piece of Basic White cs using a different colour for each rectangle.  To achieve the faded areas, blend heavier at one end of the rectangle going lighter towards to other end but not touching it as you will create a line.  Link to a video tutorial is further below.
  • Trim this down to measure 3/4" less than the card front and glue this to the piece of Pear Pizzazz cs.  Attach this to the card front using Dimensionals. Keep the pieces that have been trimmed away.
  • Stamp a greeting onto Basic White cardstock using Orchid Oasis ink and die cut using the fancy-cornered label die from All That Dies. I used a Stamparatus to get accurate placement for all my stamping.
  •  Die cut two each of the straight flags in Daffodil Delight and Orchid Oasis cs.  Trim about 1/2" off each one and glue these onto the back of the label then attach to the card front using Dimensionals. I didn't add any embellishments as the males in my family don't appreciate the extra pretties.
  • To finish off the inside, trim down a strip that was cut away from the background and glue to the second piece of Basic White cs.  Glue this to the inside of the card.


Feel INKspired to join the challenge? I would love for you to join us! It's a great way to have fun with different colours! 

Firstly, hop on over and check out the creations of the Colour INKspiration Crew in the Challenge album on our Facebook page. Then you have 12 days from today to make and upload your creation to the Facebook Colour INKspiration Group. You don't have to have a blog to participate but if you do, you can link back to your post. Just a reminder to use all the challenge colours. Neutrals such as Whisper White, Very Vanilla, Crumb Cake, Sahara Sand and Basic Black are also allowed as well as Metallics. 

If you feel inspired, click here and ask to join Colour INKspiration, add the group to your Favourites and share it with your crafty friends so they can join in the fun too. We can't wait to see what you create with these gorgeous colours! 

Thank you so much taking the time to drop in. I hope I have inspired you and if you like what I have shown or if you have any questions, please leave them in the comments section below.   

Until next time, take care, stay safe and have a great day!  

Monica xx

.


To purchase any of the products I've used today, you can click any of the direct links in the Product List below or click the 'Shop Online' tab at the top of this page.  Both ways will get you directly to my online store, where you are only minutes away from getting products delivered straight to your door.


Or maybe you have a wish list as long as your arm? If so, the best deal in the catalogue is to join my Stamping Queens Stamping Team. Fill your Starter Kit with your choice of products to the value of $235.00 for only $169.00 with a 20% discount every time you place an order! No risk attached!


.

 Product List


.


Stamp Your Own Designer Paper - Colour INKspiration Challenge #163

Hello and welcome!  Today I am sharing a stamped project that I've created for Colour INKspiration Challenge #163. The inspiration photo...