19 January 2022

Valentines Day Card featuring Nut & Bolts Stamp Set


Hello and welcome!  Thanks for popping in!

 Today there was a BBB (Big Brown Box from Stampin' Up!) delivered to my door and I couldn't wait to grab out a few of the goodies and start creating.  Today is also my birthday and I couldn't think of a better way to spend the day, especially when socialising is being kept to a minimum right now.

So for my project today, I decided to make an early Valentine's Day card with the Nuts & Bolts Stamp Set.  Valentine's Day here in Australia isn't that big of a deal and any special Valentines messages are usually only given to Hubby although I did do a 'Random Act Of Kindness' one year and handed out small note cards to people.  


This Stamp Set comes with three different robot images, a double heart  and shadow image plus four different greetings.  It will, I feel, be a very versatile set, cute for the kids but still appropriate for adults.  I have to admit, this card was a lot of fun to create!


 Supplies You'll Need:

  • Stamp Set: Nuts & Bolts (J-J 2022 Mini Catalogue)
  • Dies: Tasteful Label  Dies (AC 2021-22), Give It A Whirl Dies (AC 2021-22)
  • Cardstock:  Basic Gray, Smoky Slate, Night of Navy, Blushing Bride, Basic White
  • DSP:  Hey Sports Fan!
  • Inks:  Basic Gray  
  • Colouring Tools: Smoky Slate Stampin Blends Combo Pack, Stampin' Blends Colour Lifter.
  • Tools:  Paper Trimmer, Mini Stampin' Cut & Emboss Machine, Blending Brushes, Scissors
  • Adhesives:  Tombow Liquid Glue,  Mini Dimensionals 

Assembling The Card:

  • Create a card base from Basic Gray cardstock
  • Trim a piece of the navy pinstripe DSP down so that it's 1/2" smaller on two sides than the card front and glue this on with Tombow or your prefered adhesive.
  • Stamp the image on Smoky Slate cardstock using Basic Gray ink.
  • Using the light Smoky Slate Stampin' Blend, gently add colour to areas where there would be shadows.
  • Using the Stampin' Blend Colour Lifter, gently go over the Smoky Slate colour in small circles to blend the edges.
  • Stamp the greeting under the image and die cut using the cornered rectangle in the Tasteful Label Dies.
  • Using a Blending Brush, gently add ink to the edges of the die cut label in Basic Gray ink. 
  • Stamp the same robot image on Blushing Bride cardstock with Basic Gray ink and fussy cut the heart out.  Attach this over the gray heart with a Mini Dimensional.
  • Attach this label to the card front, centering it over the piece of DSP.
  • Die cut three of the smaller hearts from Give It A Whirl Dies in both Night of Navy and Blushing Bride cardstock.
  • Use a Blending Brush and gently blend Basic Gray ink onto the edges of each heart to add a bit of grunge. 
  • Arrange the hearts and either glue directly or attach with Mini Dimensionals.
  • Trim a piece of Basic White cardstock to fit the inside of the card and stamp the double heart image once in the top left corner and twice in the bottom right in Basic Gray ink. I've left mine as is but feel free to colour with a co-ordinating Stampin' Blend. 
  • I haven't added any embellishments, as my Valentine isn't a blingy sort of fella, but once again, feel free to add them if you think your recipient will enjoy them.


 Thank you so much taking the time to drop in. I hope I have inspired you and if you like what I have shown or if you have any questions, please leave them in the comments section below.  

 
Take care, stay safe and have a great day! 
 
Monica xx
To purchase any of the products I've used today, you can click any of the direct links in the table above or click the 'Shop Online' tab at the top of this page.  Both ways will get you directly to my online store, where you are only minutes away from getting products delivered straight to your door.

Or maybe you have a wish list as long as your arm? The best deal in the catalogue is to join my Stamping Queens Stamping Team. For $169.00 you get to choose $235.00 of products with a 20% discount every time you place an order!
 

14 January 2022

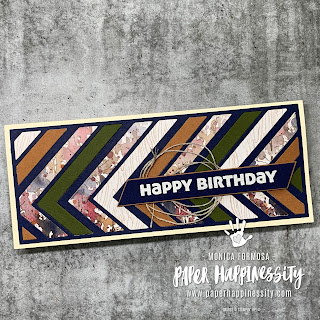
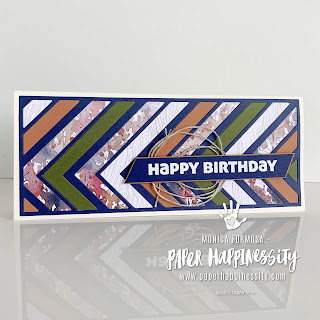
WCMG Masculine Challenge feat Slim Sayings Bundle


Hello my crafty friends and thanks for  popping in!  

Today I would like to share another card I have created using the Slim Sayings Bundle.  There is a masculine challenge over in the World Card Making Group on Facebook and I thought  this Bundle would be perfect!

This card does require quite a bit of die cutting but once you've done that, it's quite simple to put together. And the great thing about this, is you will have lots of extra pieces to make at least two more cards as you will see below.


 Supplies You'll Need:

  • Slim Sayings Bundle
  • Cardstock:  Very Vanilla, Night of Navy, Cinnamon Cider, Mossy Meadow
  • 2 pieces of Co-ordinating DSP - I've used paper from Bloom Where You Are Planted and Beauty  Of The Earth
  • Inks:  VersaMark
  • Colouring Accessories:  White Embossing Powder
  • Embellishments:  Linen Thread
  • Tools:  Stampin' Cut & Emboss Machine, Paper Trimmer, Snips, Heat Tool
  • Adhesives:  Tombow Liquid Glue, Dimensionals

How To Assemble:

  • Create a card base using Very Vanilla cardstock measuring 8 1/2" x 7" and score this at 3 1/2" on the 7" side.
  • Using the chevron shape die, die cut one each in the Night of Navy, Mossy Meadow and Cinnamon Cider cardstock and also one in each of the co-ordinating DSPs.  You will have five all together. Put all these pieces somewhere safe as we will need them for the card front.
  • Take the Night of Navy die cut and adhere this onto the card front.
  • Using the negative pieces from the other die cut frames, create a pattern and once you're happy, adhere these in using Tombow Liquid Glue.
  • On a scrap of Cinnamon Cider cardstock stamp your greeting in VersaMark and heat emboss with White Embossing Powder and trim to your preference.
  • Trim a piece of Night of Navy cardstock slighty larger (mine is 1/16" on all sides) and glue behind the stamped greeting. Add Dimensionals to the back, remove the backings but DO NOT ATTACH to the front of the card just yet.
  • Take a piece of Linen Thread and create a loop and with help of the Dimensionals, stick both the looped thread and the stamped greeting together at the same time.
  • Feel free to decorate the inside of your card if that is your preference.

Now, because I had so much cardstock and DSP leftover and I didn't want it to go to waste, I went and made two more cards and I still have heaps left to make at least another.  I used the Cinnamon Cider frame and the Mossy Meadow die cut frame again on Very Vanilla card bases and because the DSP also co-ordinated with those colours, I didn't need to die cut more paper.  Stampin' Up! is great like that!


 I now have at least three masculine cards in my card collection for those last minute birthdays that seem to come up unexpectedly.

Feel inspired to join our little group?  Head over to Facebook and ask to join here: World Card Making Group.  We're quite a friendly bunch and do monthly challenges with all who participate going into a draw to receive a card from one of the Admin Team. Have friends who you think might like to join as well, please feel free to invite them also.

 Thank you so much taking the time to drop in. I hope I have inspired you and if you like what I have shown or if you have any questions, please leave them in the comments section below.  

 
Take care, stay safe and have a great day! 
 
Monica xx
To purchase any of the products I've used today, you can click any of the direct links in the table above or click the 'Shop Online' tab at the top of this page.  Both ways will get you directly to my online store, where you are only minutes away from getting products delivered straight to your door.

Or maybe you have a wish list as long as your arm? The best deal in the catalogue is to join my Stamping Queens Stamping Team. For $169.00 you get to choose $235.00 of products with a 20% discount every time you place an order!
 

.

12 January 2022

Colour INKspiration Challenge #114 feat. Slim Card Dies


Hello crafty friends!  And thanks for popping in!

Welcome to our very first Colour INKspiration Challenge for 2022.  I hope you had a wonderful Christmas and New Year and have recharged your batteries for another year of fabulous creating.   The photo for this challenge was picked by fellow Crew Member,  Lou Kitzelman and shows off the amazing beach of Mooloolaba in Queensland.  It also happens to be part of Lou's neighbourhood!


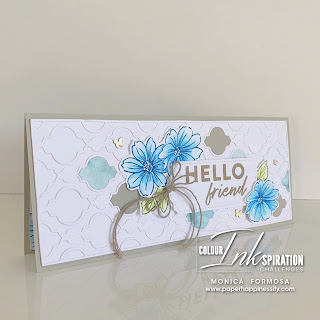
 The card I'm sharing with you today features the new Slim Dies which are available in the recently released January-June Mini Catalogue.  The best part is, if you purchase this die set or even go as far as grabbing the co-ordinating Stamp Set and getting a 10% discount on the Bundle, you are also eligible for a FREE item from our Sale-A-Bration brochure.  The stamp set I have used for my card also happens to be part of a Sale-A-Bration Bundle (Stamp Set AND Designer Series Papers) and can be yours for free with an order $180.00 (not including postage and handling).


What You'll Need:

  • Dies: Slim Card Dies (J-J 2022 Catalogue), Tailor Made Tags
  • Stamp Set: Friendly Hello (J-F 2022 Sale-A-Bration Brochure)
  • Cardstock:  Sahara Sand (card base, die cut), Basic White (die cut, card topper, card inner)
  • DSP:  Simply Marbleous (J-F 2022 Sale-A- Bration)
  • Inks:  Sahara Sand (sentiment), Pacific Point (flowers), Granny Apple Green (leaves)
  • Colouring Accessories:  Watercolour Pencils - Pacific Point (Assortment 1), Granny Apple Green (Assortment 2), Blender Pen 
  • Embellishments: Baker's Twine Essentials Pack, Brushed Brass Butterflies
  • Tools:  Paper Trimmer, Stampin Cut & Emboss Machine, Snips
  • Adhesives: Tombow Multipurpose Liquid Glue, Dimensionals

How To Assemble:

 For this card you will need:

A piece of Sahara Sand cardstock measuring 8 1//2" x 7" and scored at 3/1/2" on the 7" side. 
Two pieces of Basic White cardstock measuring 8 1/4" x 3 1/4" Use one as a base for the Die Cut and use the second as the card inner. 
A piece of Basic White cardstock measuring 8 1/2 x 3 1/2 for the die cut. 
A scrap piece of Basic White cardstock for the flowers, leaves and sentiment.

You will also need pieces of the Simply Marbleous DSP in Coastal Cabana and Sahara Sand cardstock.
 

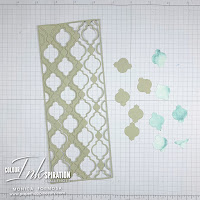
 Die cut both the Sahara Sand cardstock and the DSP and keep the negative pieces to use as details on the card front.


 Die cut the Basic White cardstock and glue down onto the other piece of Basic White cardstock to create the base for the card topper.


Stamp the large floral image in Pacific Point Ink.
 
Using the Pacific Point Watercolour Pencil, add colour to the petals around the centre of each flower.


Gently use a Blender Pen to move the colour to the edges of each petal.

Fussy cut one pair and one single flower for the front of the card.


Stamp leaves in Granny Apple Green
 
Add a tiny amount of colour to the bottom of each leaf using the Granny Apply Green watercolour pencil.  Feel free to use a different green from the same Assortment at the Pacific Point pencil.
 
Gently use a Blender pen to distribute the colour over the whole leaf.
 
Fussy cut all three leaves for the front of the card.

 
Stamp the sentiment in Sahara Sand ink and die cut using the second to largest tag die in the Tailor Made Tag Dies.
 
Add some bakers twine and tie a bow - I used two strands.
 
Attach this to the front of the card using Dimensionals. 


I fussy cut the extra stamped image I had coloured and stuck to to the card inner then glued this to the inside of the card.


Arrange the stamped images.  I have glued the top flowers and all leaves directly to the card front with Tombow Liquid Glue.  The bottom flower as been attached with a Dimensional.
For a final touch, I added a few Brushed Brass Butterflies.


Finished card.


 Feel INKspired to join the challenge? I would love for you to join in our colour challenges. It's a great way to take yourself out of your comfort zone and use different colours! 

Firstly, get some INKspiration by checking out all of the creations of the Colour INKspiration Crew in the challenge album on our Facebook page. Then you have 12 days from today to make and upload your creation to the Facebook Colour INKspiration Group. You don't have to have a blog to participate but if you do you can link back to your post. Just a reminder to use all of the challenge colours. You can also use neutrals such as Whisper White, Very Vanilla, Crumb Cake, Sahara Sand and Basic Black as well as Metallics.

Not a member of the Colour INKspiration Facebook group yet? Just click here and ask to join Colour INKspiration, add the group to your favourites and share it with your crafty friends so they can join in the fun too. We can't wait to see what you create with these gorgeous colours.
  
Thank you so much taking the time to drop in. I hope I have inspired you and if you like what I have shown or if you have any questions, please leave them in the comments section below.  
 
Take care, stay safe and have a great day! 
 
Monica xx
.
 
To purchase any of the products I've used today  you can click any of the direct links in the Product List below or click the 'Shop Online' tab at the top of this page.  Both ways will get you directly to my online store, where you are only minutes away from getting products delivered straight to your door.

Or maybe you have a wish list as long as your arm? If so, the best deal in the catalogue is to join my Stamping Queens Stamping Team. Until the end of November, you'll get the $169.00 Starter Kit - filled with your pick of products to the value of $235.00 - for only $130.00 with a 20% discount every time you place an order!
 

                                                 .

 Product List


 Live In Australia? Shop With Me!


Stamp Your Own Patterned Paper - Colour INKspiration Challenge #174

    Hello and welcome!  And thanks for popping in! Let me share with you my latest project created for Colour INKspiration Challenge #174.  ...