


Picture credit - http://dogbikecarrier.com/dog-travel-carriers/
I absolutely loved creating with these rich colours and I got a certain Christmas vibe when I initially saw the photo. Going with this thought, I decided to use the Ringed With Nature Bundle. This is a unique Bundle as it features an 3D embossing folder that you can also use dies with. For a little bit of extra elegance, I added a touch of gold foil. The background texture was created using the Painted Texture 3D Embossing Folder which I thought worked well with the theme I had chosen.
Supplies:
- Bundle: Ringed With Nature
- Punch: Banners Pick A Punch
- Embossing Folder: Painted Texture 3D
- Cardstock: Cherry Cobbler, Very Vanilla, Gold Foil
- Inks: Early Espreso, Cherry Cobbler, Sweet Sorbet
- Stampin' Blends: Natural Tones Deep Combo Pack (SU100), Crumb Cake Combo Pack, Cherry Cobbler Combo Pack, Sweet Sorbet Combo Pack
- Colouring Accessories: Wink Of Stella
- Embellishments: Adhesive-Backed Seasonal Sequins (gold)
- Tools: Paper Trimmer, Stampin' Cut & Emboss Machine, Stamparatus, Blender Brushes, Sponge Dauber, Bone Folder
- Adhesives: Tombow Liquid Glue, Mini Dimensionals, regular Dimensionals
Let's Make It:
For this project you will need the following cardstock:
- Cherry Cobbler card base
- Very Vanilla card inner measuring 1/4" less on two sides than the card front
- Gold Foil mat layer measuring 1" less on two sides than the card front (for a 1/2" border all round)
- Very Vanilla mat layer measuring 1 1/8" less on two side than the card front (for a small 1/16" gold foil border)
- Scraps of Very Vanilla cardstock for the die-cuts
- A strip of Very Vanilla cardstock measuring 3 1/2" x 3/4" for a sentiment
- A strip of Cherry Cobbler cardstock measuring 4" x 1/2" for under the sentiment.

- Die-cut three double-leaf dies from the centre of the Goil Foil and set these aside.

- Run the Very Vanilla cardstock layer through the Stampin' Up Cut & Emboss Machine using the Painted Texture 3D Embossing Folder and glue to this to the Goil Foil layer.

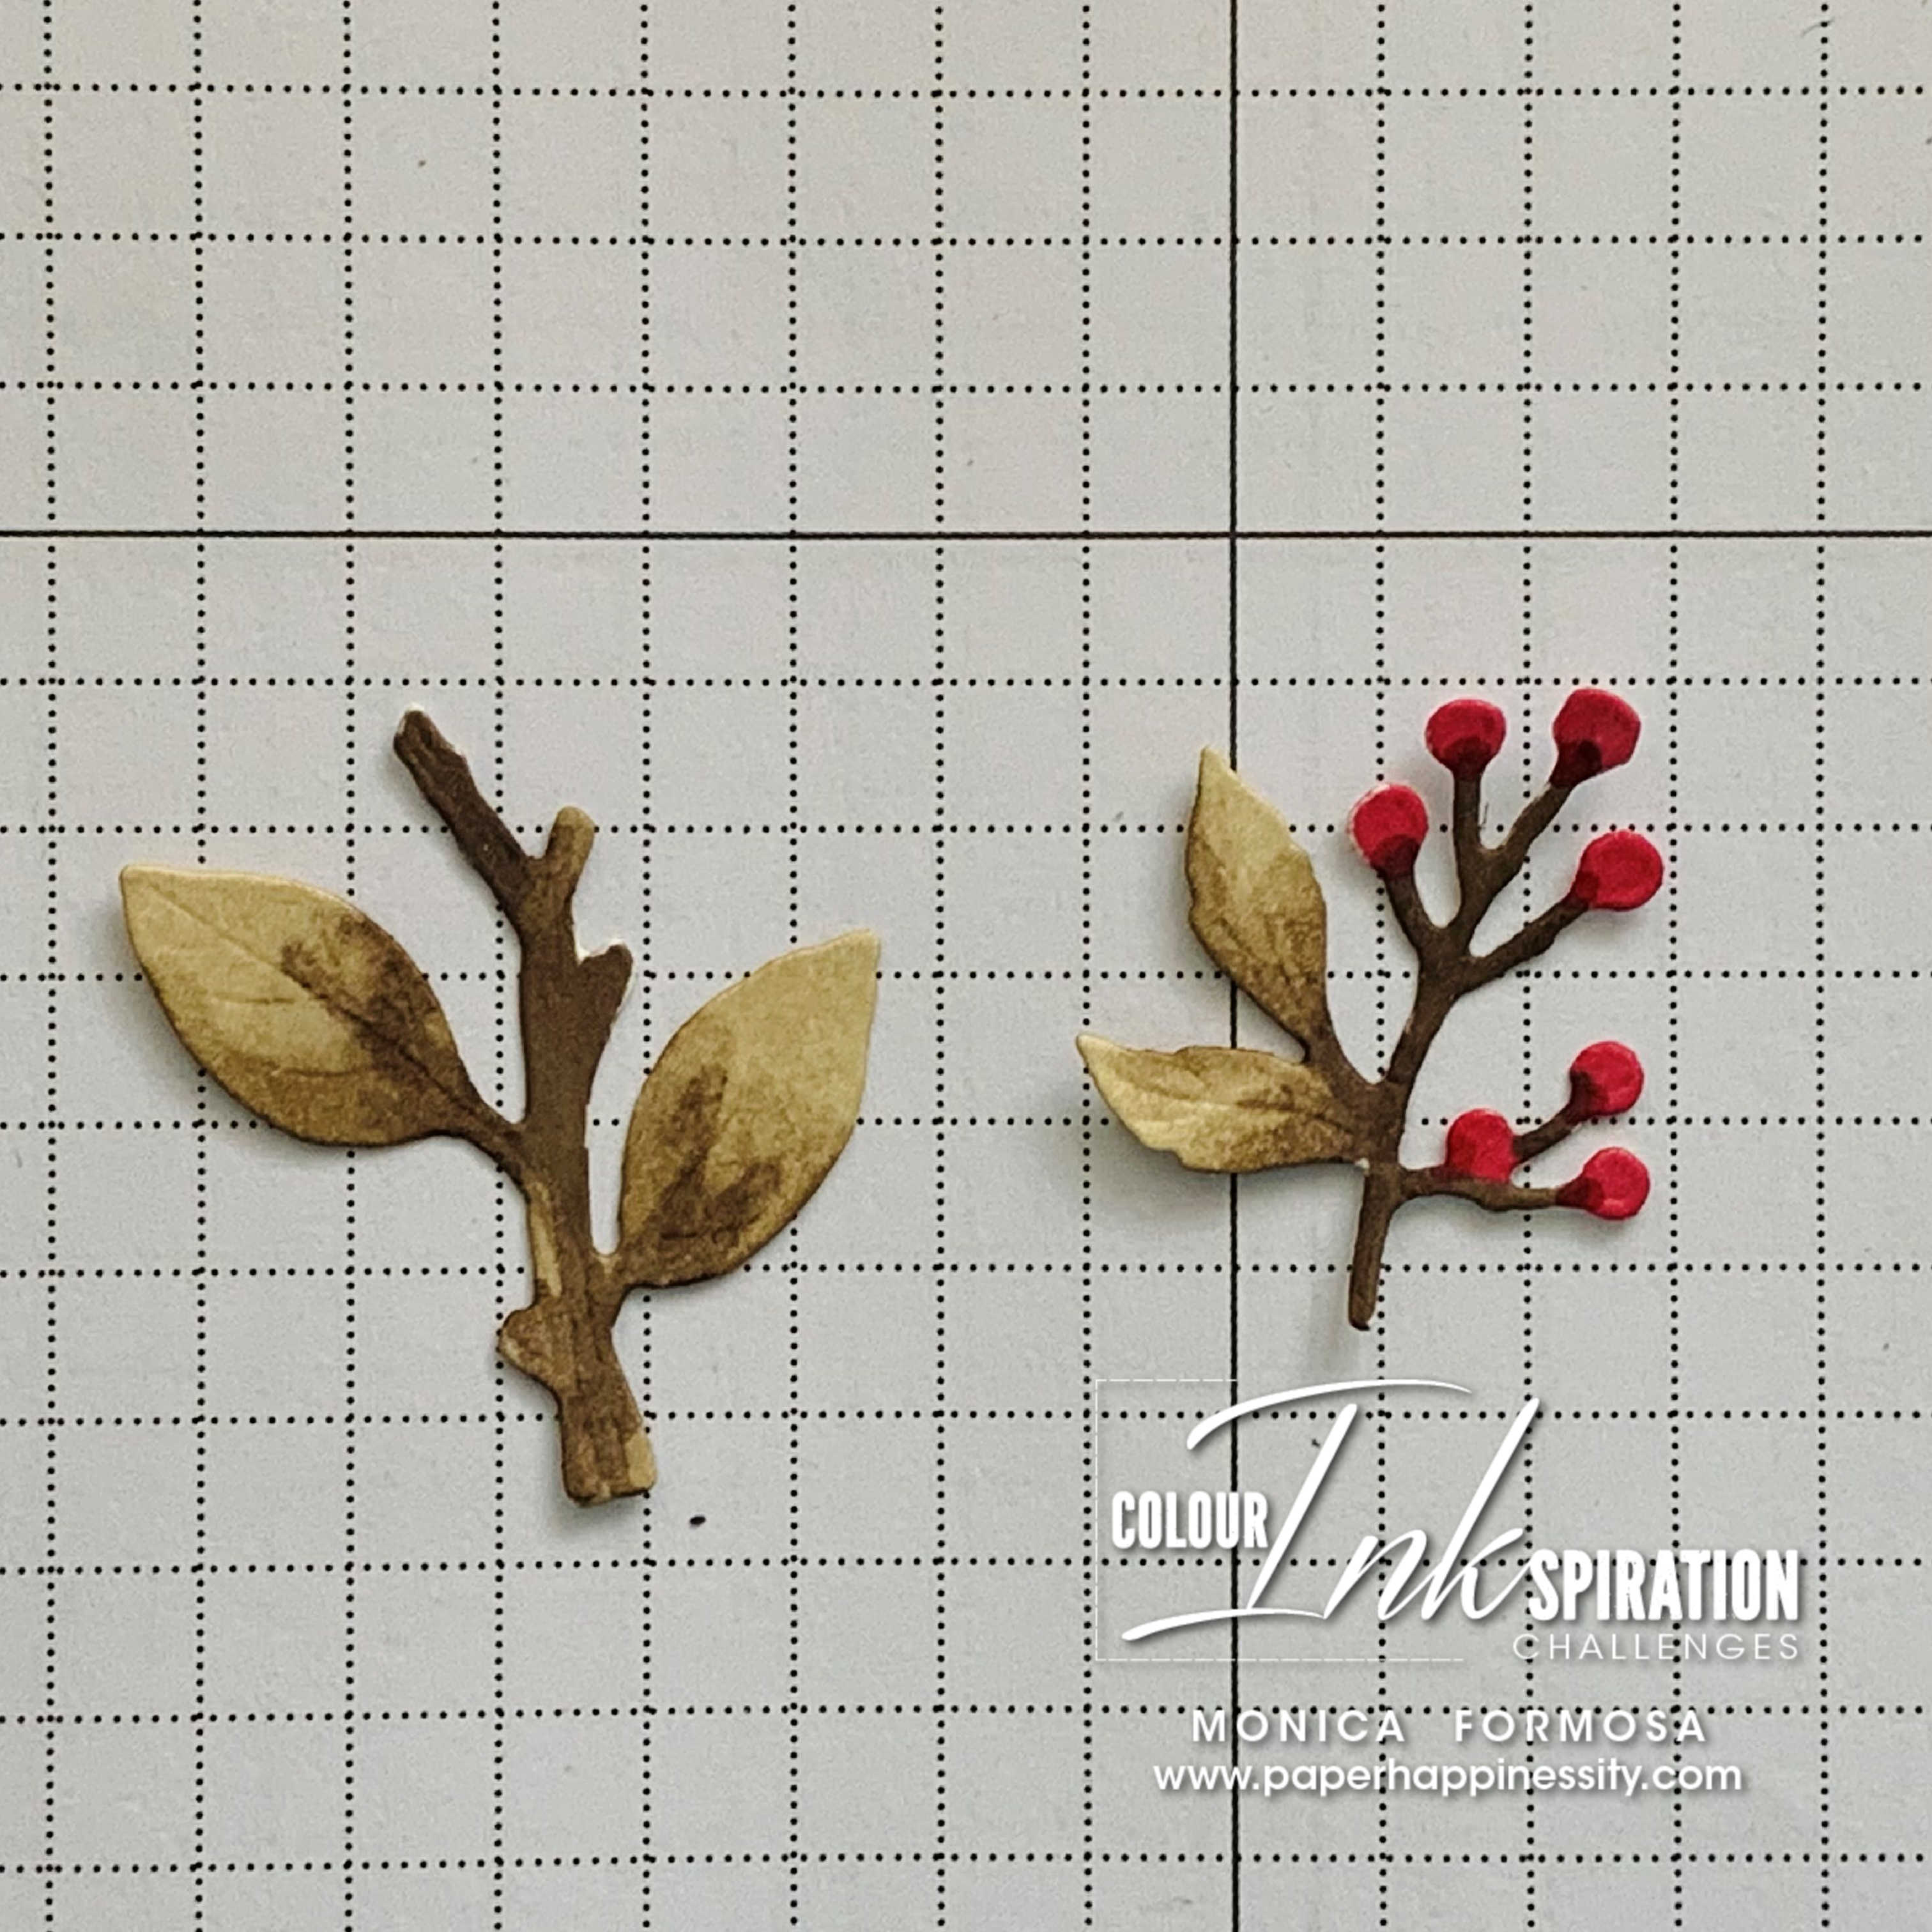
- Die-cut at least four of the double-leaf branches and at least four of the berry twigs (I felt I needed a fifth one after finishing my card) from Very Vanilla cardstock. I die-cut a heap as I wasn't quite sure at this point how many I was going to need.
- Ink up the inside of the top (the side where is Stampin' Up! logo is) of the Tree Rings Hybrid Emboss Folder and place the large connected tree ring die into position and place a piece of Very Vanilla cardstock over one of the larger tree rings. Gently close the folder and run through the Cut & Emboss Machine. This will give you dark lines where the cardstock has been debossed.

- Using a blender brush, go around the edges with Early Esspresso ink and without reloading the brush, use the remaining ink to colour the middle.

- I used my Stamparatus to stamp a poinsettia image first inking up using Sweet Sorbet ink then without cleaning my stamp, I adding Cherry Cobbler ink to the centre using a sponge dauber and restamped to get a lovely blended colour. Once dry add Wink Of Stella and fussy cut.

- Colour each sprig using one of the red tones for the berries, SU100 from the Deep Combo Pack for the stems and lower section of the leaves, Dark Crumb Cake for the mid-sections and Light Crumb Cake for the tips. Use a bone folder to round over the leaves and add a mini-dimensional to each of the larger leaves to create dimension.
- Attach the coloured tree ring to the card front with Dimensionals. TIP: Place the Dimensionals towards the centre as this will make placing the other die-cuts easier.
- Arrange the die-cuts around the tree ring as you please using Tombow Liquid Glue (or Mini Glue Dots if you prefer), trimming if needed for a better fit.
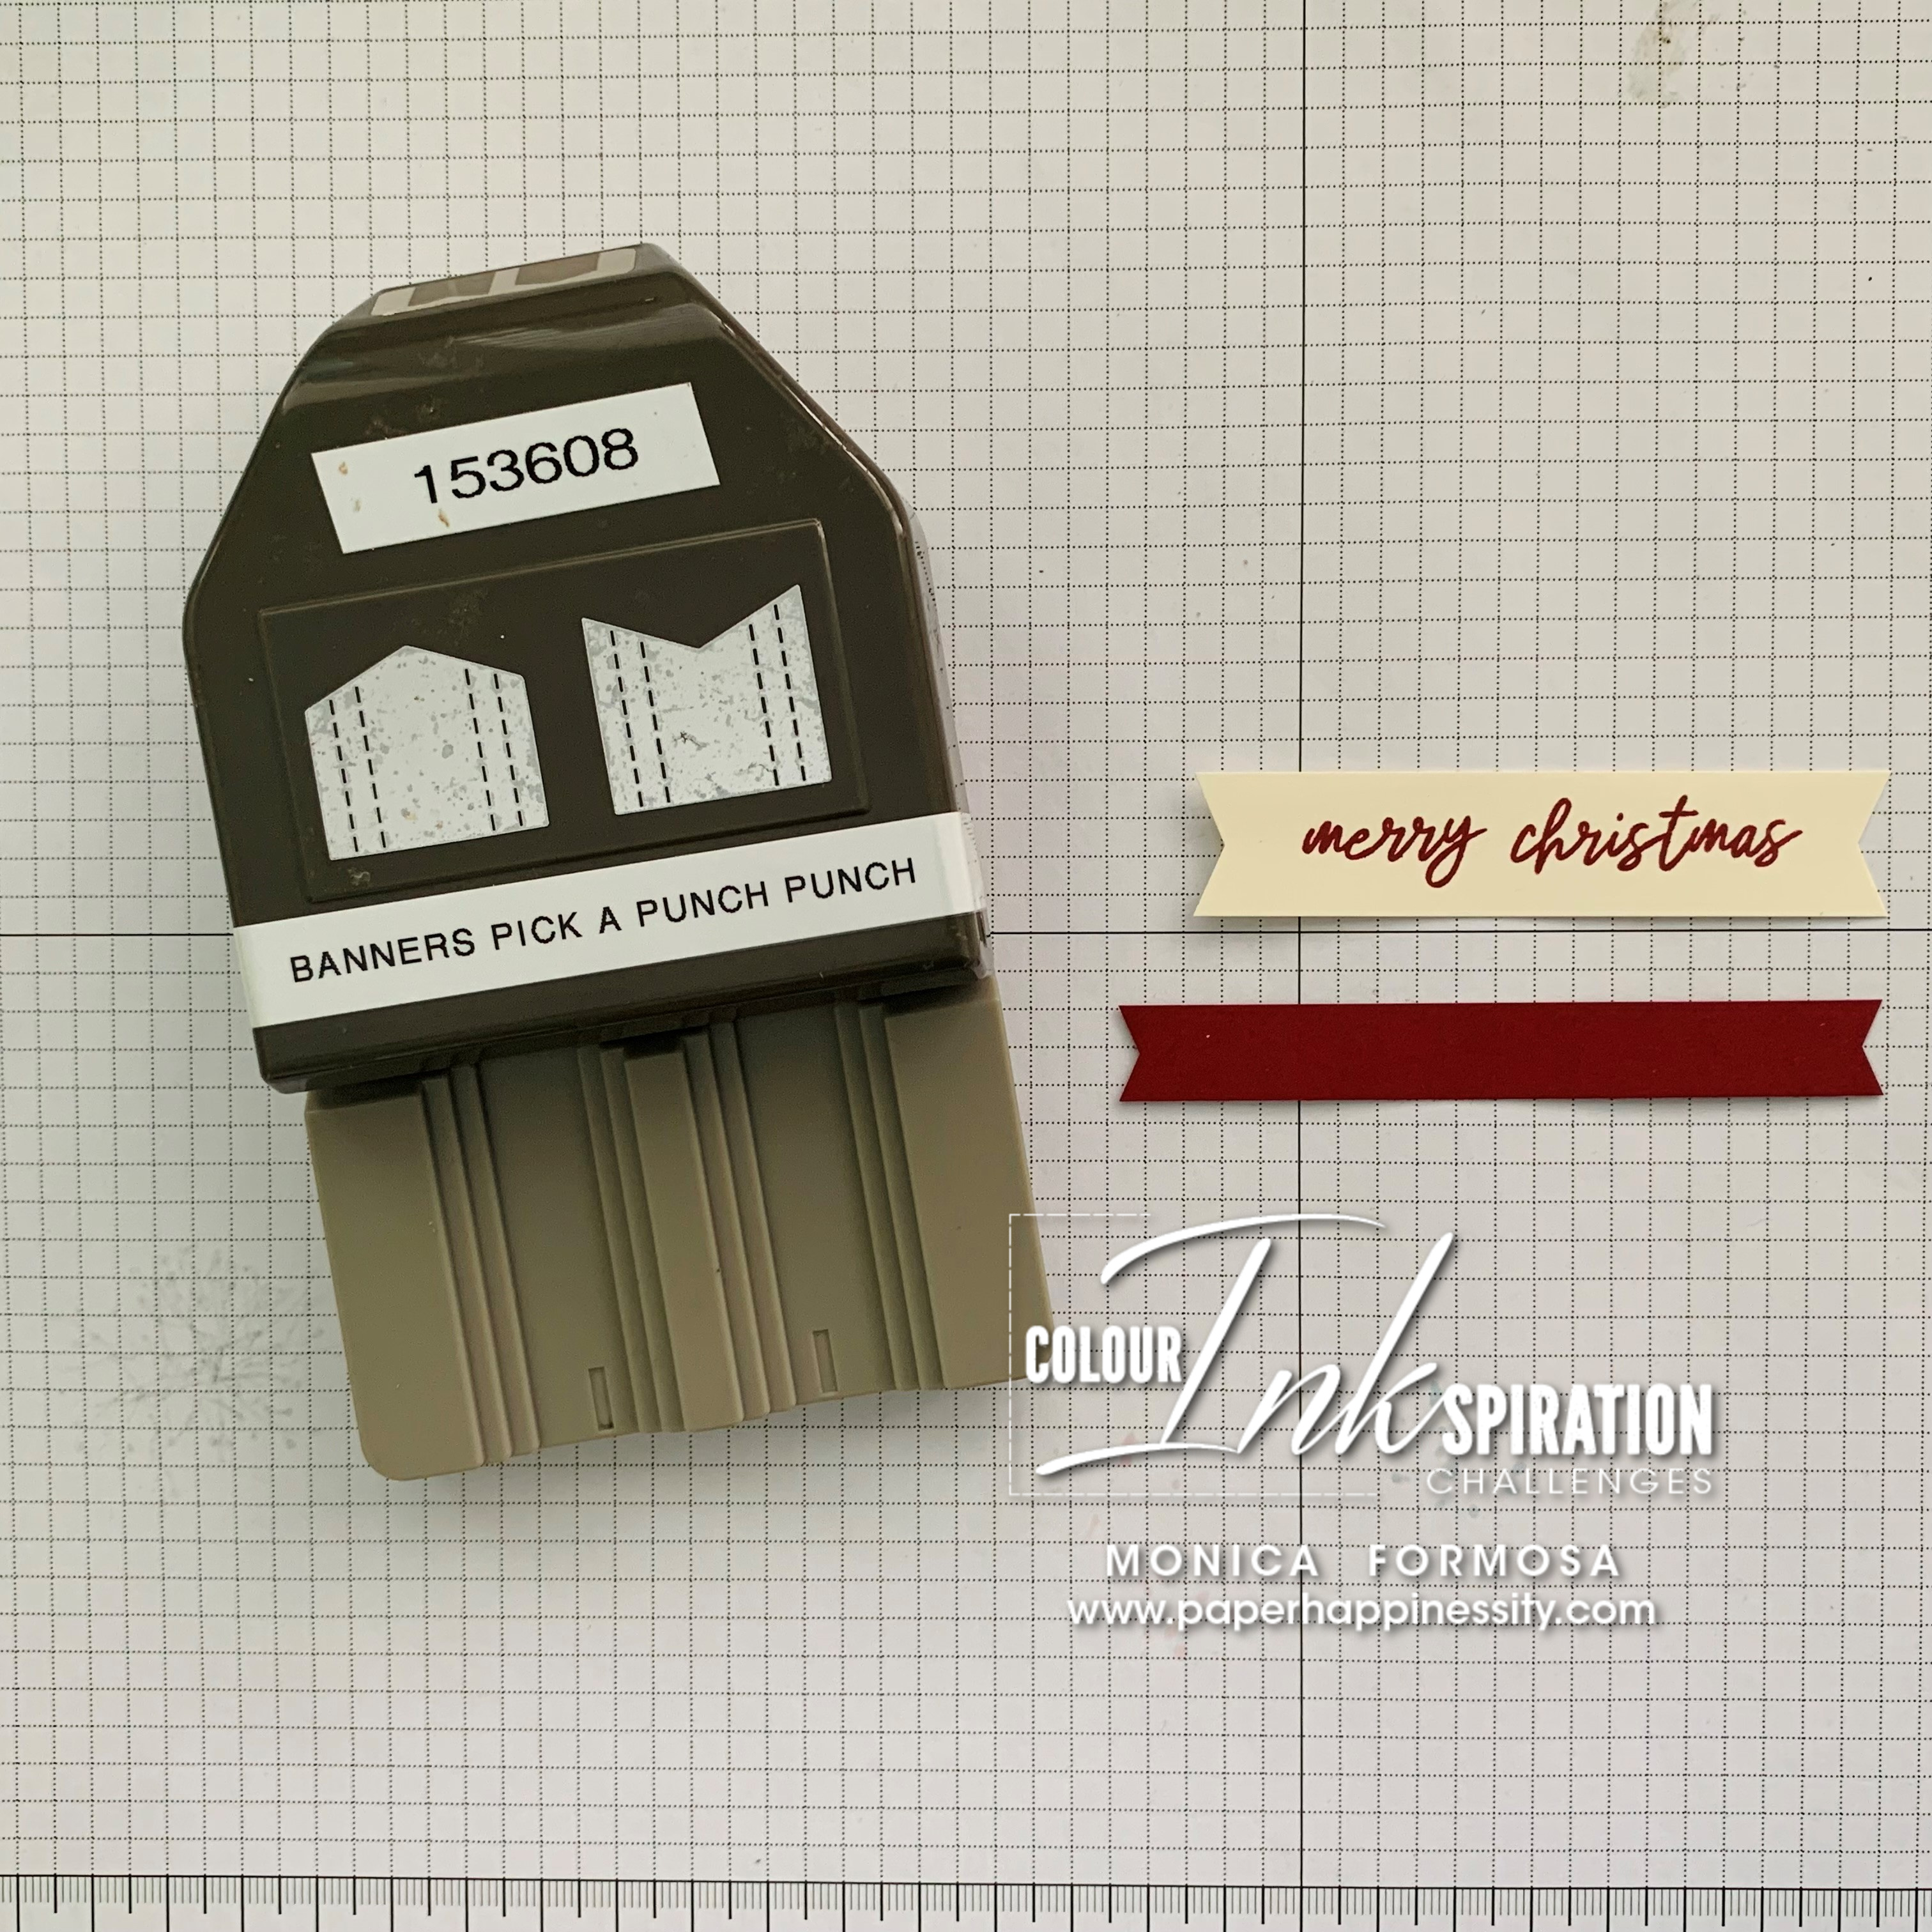
- Stamp a greeting on the strip of Very Vanilla in Cherry Cobbler Ink and trim to fit using the Banners Pick a Punch. Trim a piece of Cherry Cobbler cardstock with the same punch allowing a small section showing underneath. Glue together and attach using Dimensionals. The left side will need two underneath to keep it at the same height as the right side.
- Add a few gold sequins from the Adhesive-Backed Seasonal Sequins to complete the front.
- Stamp the poinsettia image as before on the Very Vanilla card inner and glue to the inside to finish your card.


Feel INKspired to join the challenge? I would love for you to join us! It's a great way to have fun with different colours!
Firstly, hop on over and check out the creations of the Colour INKspiration Crew in the Challenge album on our Facebook page. Then you have 12 days from today to make and upload your creation to the Facebook Colour INKspiration Group. You don't have to have a blog to participate but if you do, you can link back to your post. Just a reminder to use all the challenge colours. Neutrals such as Whisper White, Very Vanilla, Crumb Cake, Sahara Sand and Basic Black are also allowed as well as Metallics.
If you feel inspired, click here and ask to join Colour INKspiration, add the group to your Favourites and share it with your crafty friends so they can join in the fun too. We can't wait to see what you create with these gorgeous colours!
Thank you so much taking the time to drop in. I hope I have inspired you and if you like what I have shown or if you have any questions, please leave them in the comments section below.
Until next time, take care, stay safe and have a great day!
Monica xx
.
To purchase any of the products I've used today, you can click any of the thumbnail links in the Product List below or click the 'Shop Online' tab at the top of this page. Both ways will get you directly to my online store, where you are only minutes away from getting products delivered straight to your door.
Or maybe you have a wish list as long as your arm? If so, the best deal in the catalogue is to join my Stamping Queens Stamping Team. For the month of October you can fill your Starter Kit with your choice of products to the value of $283.00 for only $169.00 - that's an extra $48.00 worth of product - with a 20% discount every time you place an order! No conditions attached!

")


Stunning Monica ... you have coloured up that tree slice perfectly!!! xx
ReplyDelete