14 June 2023

Celebrate In Style - Colour INKspiration Challenge #145


Hello and welcome to another Colour INKspiration Challenge. We have such bright and fun colours to play with for this Challenge and I can't wait to see what everyone has created.  The inspiration photo was chosen by fellow Crew member, Cheryl Miller and our Guest Designer for this Challenge is the lovely Vicki Allanson.


Picture credit - https://shopperboard.com/Ocean/product/22186917

My card features two Die sets and has no stamping at all.  I've teamed the Stylish Shapes Dies and the Wanted To Say Dies with the Gorgeous Gingham Designer Papers for a fun card which could be used for any occasion - birthday, graduation, anniversary, just to name a few.  


Because the Gorgeous Gingham paper comes in 6"x 6", I took a sheet of the Blueberry Bushell design and trimmed it in half and used this to create a custom-size card base measuring 7" x 8" scored at 4" along the 8" side.  The two cardstock mat layers were both trimmed to 6 1/8" x 3 1/8" and all three were glued together at different angles.  

Circles in the three colours were die-cut using the three smallest circle dies and arranged across the top layer.  Using  the Wanted To Say Dies, the word 'celebrate' was die-cut in Basic White backed with a piece of Adhesive Sheet and the co-ordinating shadow was die-cut in Vellum. This was glued to the card topper with Liquid Tombow lightly applied with a sponge.

The topper was then attached to the card front using Black Dimensionals.  To finish the front, I added a few of the Loose Silver Sequins which adds a subtle embellishment.

To complete the card, I glued a few left-over circles to opposite corners on a piece of Basic White cardstock and glued this to the inside.


If you would like to purchase any of the products used to create this card, please click on any of the thumbnail links in the Product List below or alternatively, click on my Stampin' Up! Store tab above.

SUPPLIES:
  • Dies: Stylish Shapes, Wanted to Say
  • Designer Paper:  Glorious Gingham 6"x 6"(Blueberry Bushell)
  • Cardstock:  Basic White, Blueberry Bushell, Lemon Lime Twist, Tahitian Tide, Vellum
  • Embellishments:  Loose Silver Sequins
  • Tools:  Paper Trimmer, Mini Stampin' Cut & Emboss Machine, Take Your Pick Tool
  • Adhesives:  Adhesive Sheets, Black Dimensionals, Tombow Liquid Glue

Feel INKspired to join the Challenge? Click here and ask to join Colour INKspiration.   Add the group to your Favourites and share it with your crafty friends so they can join in the fun too. We'd love to see what you create with these gorgeous colours! You don't have to have a Blog to participate but if you do, please feel free to link back to your post.

Just a reminder to use all the Challenge colours. If you don’t have all the colours in our palette, feel free to use the closest Stampin’ Up! substitute - Starry Sky instead of Blueberry Bushell for example. We also allow Ivory, Bronze and Natural Tones in the Stampin' Blends and Neutrals such as Basic White, Very Vanilla, Crumb Cake, Basic Black and Metallics.

Thank you so much taking the time to drop in. I hope I have inspired your creativity and if you like what I have shown or if you have any questions, please leave them in the comments section below.   

Until next time, take care, stay safe and have a great day!  


Monica xx


If you live in Australia and would like to purchase any of the products I've used today, click any of the thumbnail links in the Product List below or click the 'Shop Online' tab at the top of this page.  Both ways will get you directly to my Online Store, where you are only minutes away from getting products delivered straight to your door.

Or maybe you have a wish list as long as your arm? If so, the best deal in the catalogue is to join my Stamping Queens Stamping Team. 

Right at this moment, you can put together a Starter Kit with your choice of products to the value of $283.00 (usually $265.00) for only $169.00 - that's an extra $48.00 of product towards your Starter Kit over the usual Joining Offer.

.


Product List


13 June 2023

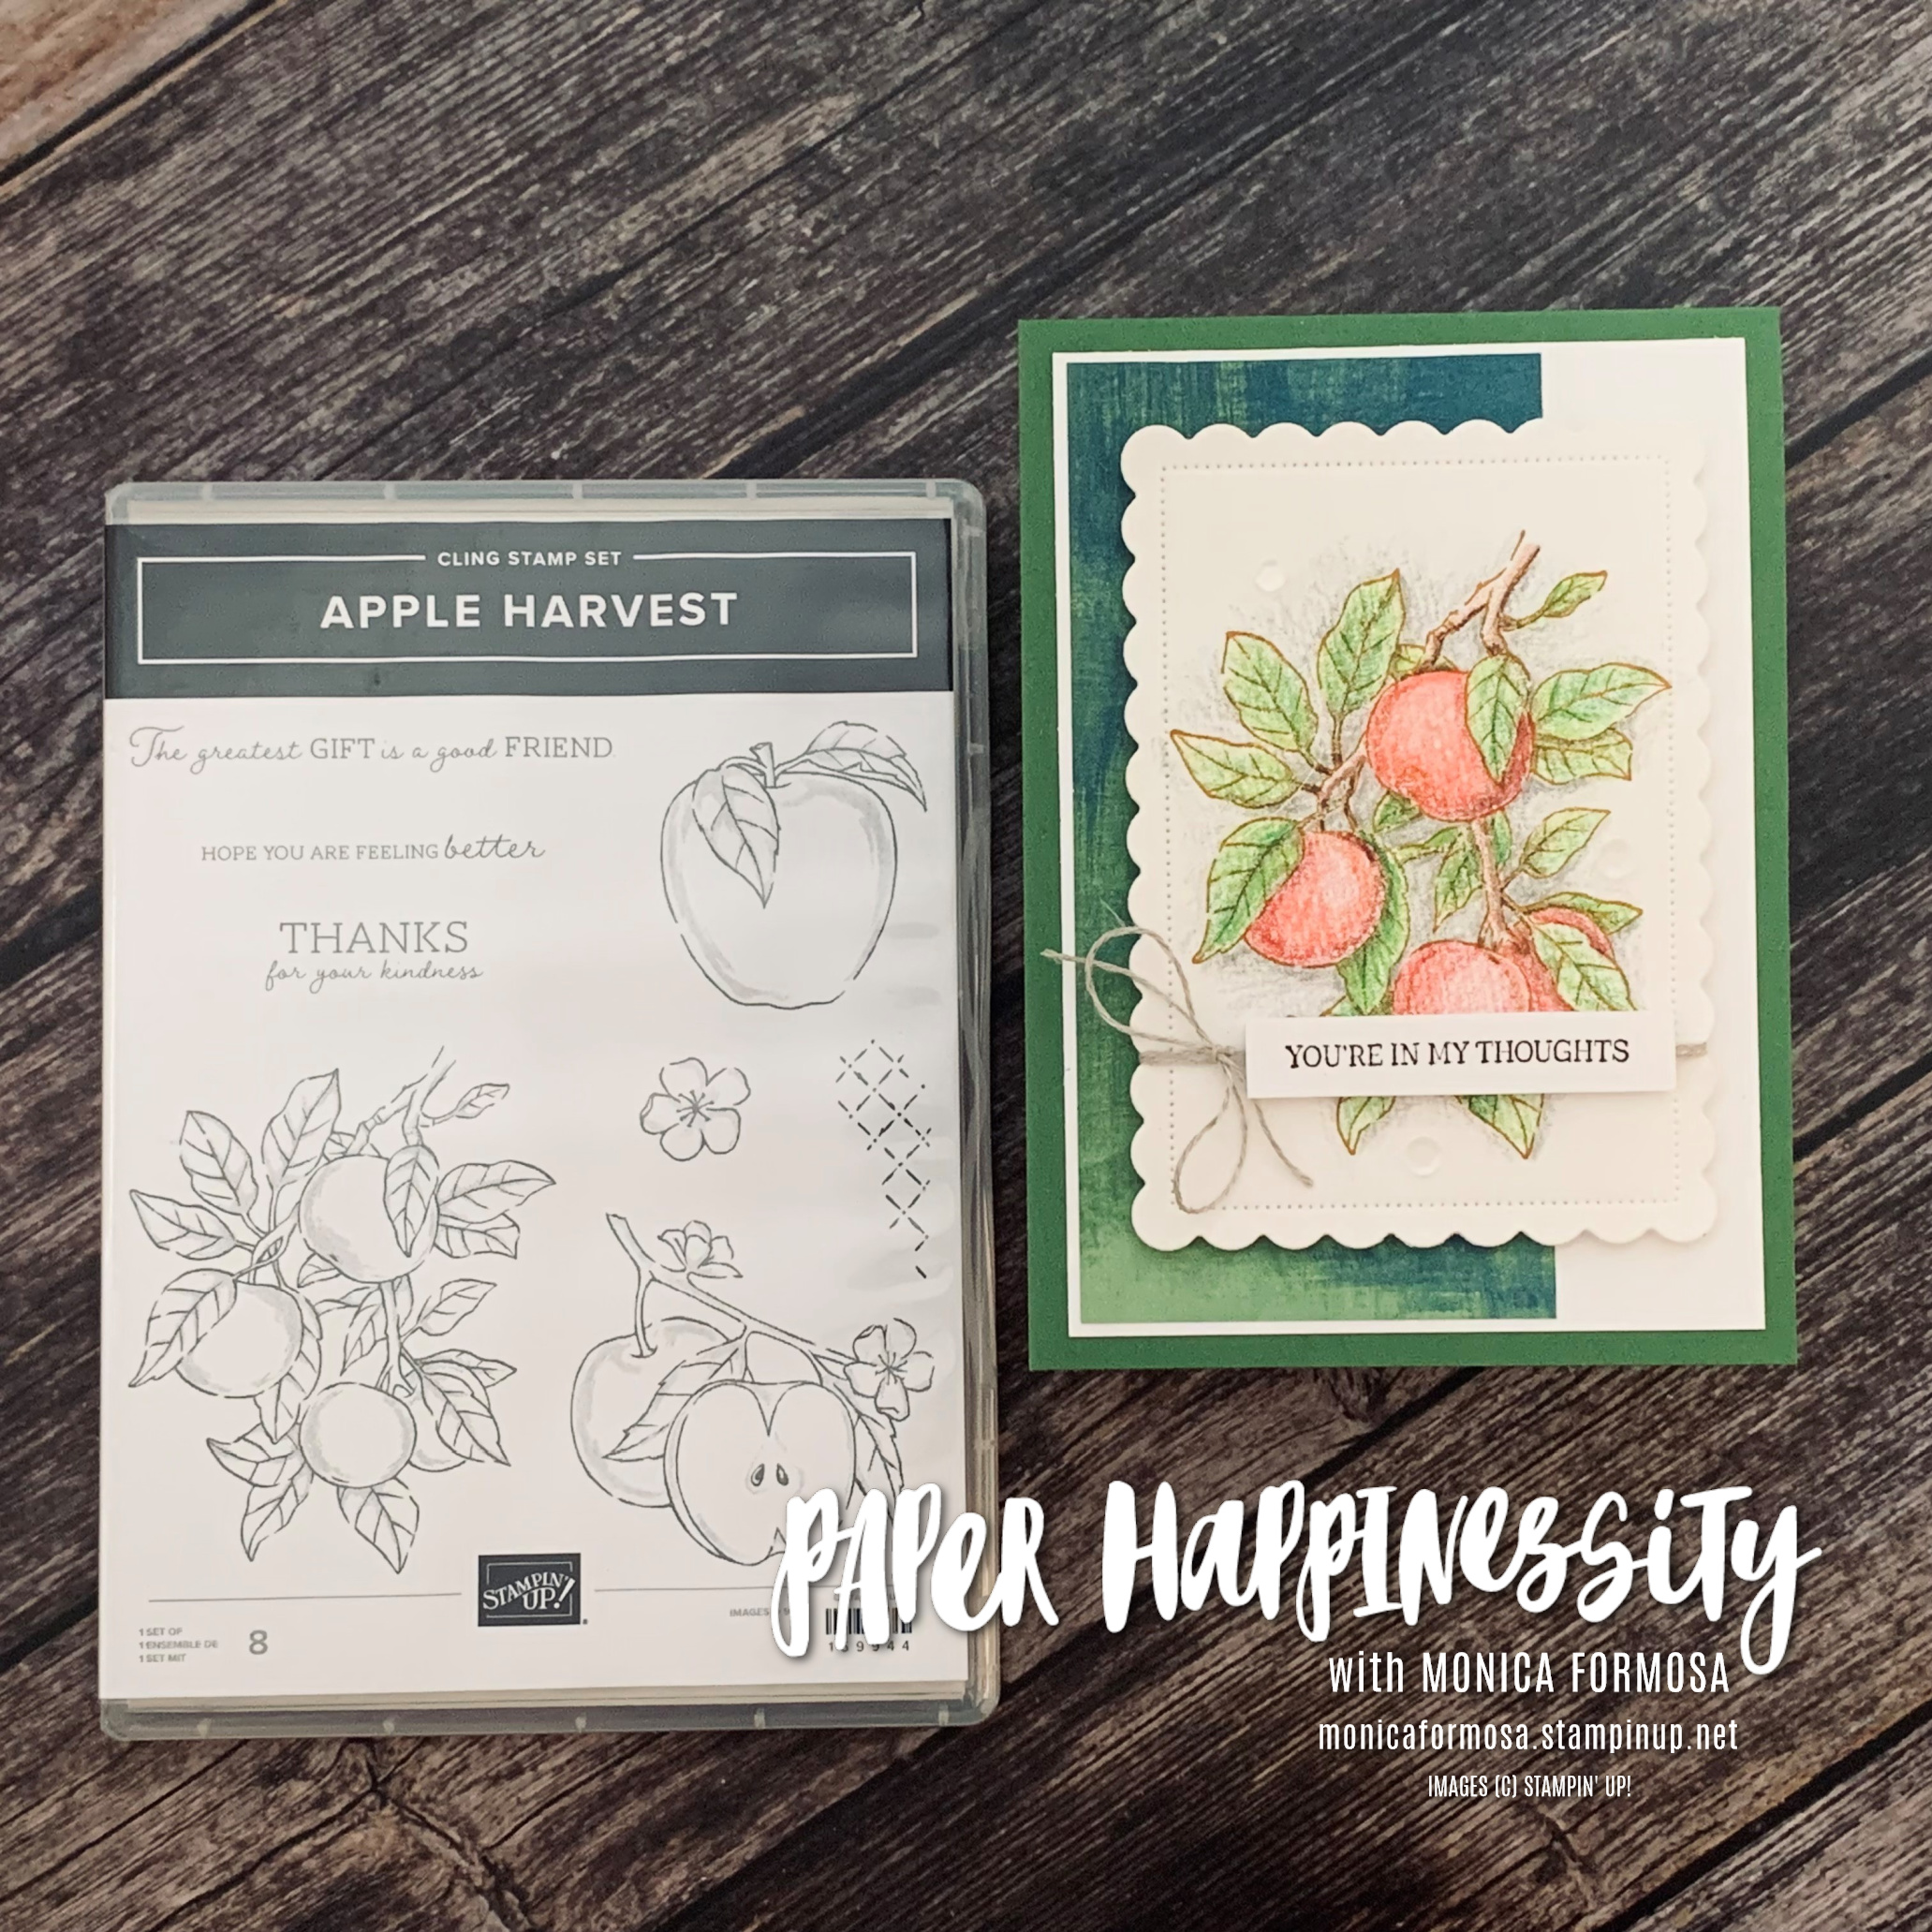
Watercolour Pencil Colouring feat. Apple Harvest Stamp Set


Hello my friends!  Welcome and thanks for popping in!  

As part of the June Challenge over in the World Card Making Group, we have been asked to create a project using our favourite technique.   Boy it was hard to choose, but I decided to go with colouring as I find this very relaxing believe it or not. 


My image comes from the Apple Harvest Stamp Set.  I need to confess, I've had this set a while but have never inked it up so today's the day.

The image was stamped in Saddle Brown StazOn Ink on a piece of Fluid 100 Watercolor Paper (smoother side).  For the colouring, I wanted to only use the Watercolour Pencils and chose Real Red and Cherry Cobbler for the apples, Granny Apple Green, Garden Green and Old Olive for the leaves and Early Espresso and Cajun Craze for the branches. Basic Gray was added to the background.  The colouring was left as is.  

The finished image was die-cut using the second to largest scalloped rectangle from Scalloped Contours Dies with some Linen Thread tied around the bottom section.  The sentiment comes from In The Moment Stamp Set and was stamped in Early Espresso and attached using the Foam Adhesive Strips.

A piece of Basic White cardstock was layered with a smaller piece of Designer Paper from the Fresh As A Daisy.  This was glued to a card base in Garden Green cardstock.

A second piece of Basic White cardstock was glued to the inside to enable a message to be written clearly.

To finish of the card, add a few embellishments if desired.  


SUPPLIES:

  • Stamp Sets:  Apple Harvest, In The Moment
  • Dies:  Scalloped Contour Dies
  • Papers:  Fresh As A Daisy
  • Cardstock:  Garden Green, Basic White, Fluid 100 Watercolour Paper
  • Ink:  Saddle Brown StazOn
  • Watercolour Pencils:  Real Red, Cherry Cobbler, Granny Apple Green, Old Olive, Garden Green, Early Espresso, Cajun Craze, Basic Gray
  • Embellishments/Trim:  Linen Thread
  • Tools:  Paper Trimmer, Stampin' Cut & Emboss Machine
  • Adhesives:  Tombow Liquid Glue, Dimensionals, Foam Strips

If you live in Australia and would like to purchase any of the products used to create this card, please click on any of the thumbnail links in the Product List below or alternatively, click on my Stampin' Up! Store tab above.

Thank you so much taking the time to drop in. I hope I have inspired you and if you like what I have shown or if you have any questions, please leave them in the comments section below.   

Until next time, take care, stay safe and have a great day!  

Monica xx 

.

Do you have a wish list as long as your arm? If so, the best deal in the catalogue is to join my Stamping Queens Stamping Team. 

Right at this moment, you can put together a Starter Kit with your choice of products to the value of $283.00 (usually $265.00) for only $169.00 - that's an extra $48.00 of product over the usual Joining Offer.

JOIN MY TEAM


Product List


10 June 2023

Bridal Flowers featuring Paper Florist Dies


Hi there and welcome!  And thanks for stopping by!

Today I'm sharing this gorgeous card that was created for a Bridal Shower.  The idea was CASED  from Tammy Wilson - her card had a Pebble Path cardbase which I changed to all white due to the occasion I was making for.  


This is a custom-sized card that measures 6 1/2" x 8" and scored at 4" along 8" side. A piece of Basic White cardstock was embossed with the Delightfully Doily Hybrid Embossing Folder and matted on second piece of Basic White cardstock allowing for a small border. 

The flowers were created by ink-blending Moody Mauve and Boho Blue ink onto white cardstock then die-cut using the Paper Florist Dies.  The leaves were die-cut from Soft Sea Foam cardstock using the same Die set.  Stamen centres were die-cut in white.  The centres of each flower was embellished with the Irridescent Rhinestones. 

The sentiment comes from Charming Sentiments.  Before attaching everything, I wrapped Linen Thread around the topper and tucked a big, loopy bow under the label with the sentiment.


A custom-sized envelope was also created using a piece of Basic White cardstock measuring 8" x 11"  scored at 3 1/2" and 8" along the 11" side.  Two small concertina pieces were glued into each side to allow for expansion and a small half-circle notch was punched into the section underneath the flap to allow easier access.  Once, the card was placed in the envelope, everything was tied shut using a piece of white ribbon.

SUPPLIES:

  • Dies:  Paper Florist, Something Fancy
  • Embossing Folder:  Delightful Doily Hybrid
  • Stamp Set:  Charming Sentiments
  • Cardstock:  Basic White Thick (card base), Basic White,  Soft Sea Foam
  • Inks:  Moody Mauve, Boho Blue, Basic Gray
  • Embellishments:  Iridescent Rhinestones, Linen Thread
  • Tools:  Paper Trimmer, Blending Brushes, Stampin' Cut & Emboss Machine,
  • Adhesives:  Tombow Liquid Glue, Mini Dimensionals
If you live in Australia and would like to purchase any of the products used to create this card, please click on any of the thumbnail links in the Product List below or alternatively, click on my Stampin' Up! Store tab above.   Both ways will get you directly to my Online Store, where you are only minutes away from getting products delivered straight to your door.
Thank you so much taking the time to drop in. I hope I have inspired your creativity and if you like what I have shown or if you have any questions, please leave them in the comments section below.   

Until next time, take care, stay safe and have a great day!  

Monica xx

 .


Do you have a wish list as long as your arm?  If so, the best deal in the catalogue is to join Stampin' Up! 

Currently there is a great joining offer happening.  You can put together a Starter Kit with your choice of products to the value of $283.00 (usually $265.00) for only $169.00 - that's an extra $48.00 of product towards your Starter Kit over the usual Joining Offer.

.


Water Colouring with Embossing Folders - Colour INKspiration Challenge #193

  Hello and welcome! Today I have a card to show you which was created for Colour INKspiration Challenge #193.  The inspiration photo for th...