Hello friends and welcome!
Please join me as I showcase a very special card for Colour INKspiration Challenge #152. I went all out for this one as it is for a milestone birthday celebrated for a very special lady - Happy Birthday to my mum!
The picture for this challenge has been chosen by fellow Crew Member, Bronwyn Eastley and the Guest Designer is the lovely Heidi van den Heuvel. I can't wait to go and see what everyone has created.
 |
| Picture Credit: https://medium.com/@FaSBlog/rhapsody-in-blue-five-ideas-for-working-blue-into-your-decor-668da2d3d233 |
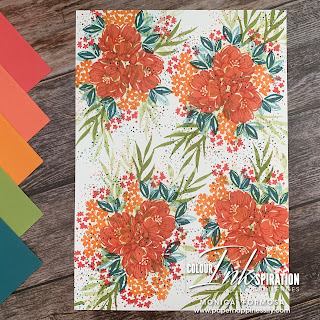
I've taken these strong, dramatic colours and given them a softer feel. At first, I attempted some watercolouring but wanted to try and achieve something softer - ink blending was the answer I was looking for. The result was perfect, creating just a suggestion of colour for a delicate outcome.

My card uses quite a few different die sets including the retired Large Numbers Dies which unfortunately cannot be purchased new but I've kept these in my collection for times when I need to create a card just like this. You may be able to pick up a set second hand if you're lucky - those who have them are not yet ready to let them go.
Supplies:
- Dies: Paper Florist, Nested Essentials, Labels Aglow, Large Numbers (retired)
- Stamp Sets: Artistically Inked, Charming Sentiments
- Cardstock: Basic White Thick, Basic White, Gray Granite
- Ink: Gray Granite, Night of Navy, Starry Sky, VersaMark
- Accessories: Basics Embossing Powder (white)
- Embellishments: Linen Thread, Iridescent Basic Pearls, Adhesive Backed Sequins Trio
- Tools: Paper Trimmer, Stampin Cut & Emboss Machine, Blending Brushes, Bone Folder, Heat Tool
- Adhesives: Tombow Liquid Glue, Dimensionals, Mini Dimensionals, Glue Dots.
Let's Make It:
- I created a card base in Basic White cardstock measuring 5" x 10", scoring at 5" to finished with a square 5" x 5 " card.
- To create the twisted easel mechanism, a second fold line was made scoring from the top right corner to the bottom left of the card front. Taking my bone folder, I burnished this score-line to ensure a crisp fold.
- A piece of Basic White cardstock was trimmed to 4 1/2"x 4 1/2" with Night of Navy ink blended in the centre. This was matted onto a piece of Gray Granite cardstock with just a tiny 1/16" border on all four sides.
- The second to largest label was die-cut in Basic White cardstock and attached with Dimensionals. The numbers 8 and 0 were also die-cut in white cardstock and these were attached with Mini Dimensionals.
- The sentiment was stamped on Gray Granite cardstock in Versamark and heat embossed in white. This was die cut using the smaller label from Labels Aglow. A second label was die-cut in Basic White cardstock and layered to provide stability.
- I blended each of the ink colours onto scraps of Basic White cardstock and die-cut three of the smaller flowers (two in Starry Sky and one Night of Navy) and three foliage pieces.
- The coloured die-cut pieces were arranged around the '80' and attached with Glue Dots with the sentiment placed over all these using Dimensionals on each end and glue where it touches with numbers.
- A three-strand bow was created using Linen Thread and tucked under the bottom-right of the label.
- Iridescent Pearls were added to the centre of two of the flowers and the white sequins were added to create subtle glamour.
- This piece was adhered to the bottom section of the card front ensuring that the top section remains free of any adhesive.
- A second piece of Basic White cardstock was matted onto a piece of Gray Granite cardstock again allowing a small 1/16" border on all four sides and was adhered into the centre of the card.
- To provide an anchor for the easel, the sentiment from Charming Sentiments was stamped in Gray Granite ink and then die-cut using the appropriate rectangle die from Nested Essentials. This was attached using Dimensionals.


Feel INKspired to join the challenge? I would love for you to join
us! It's a great way to have fun with different colours!
If you'd like to join in with our Challenges, click here and ask to join Colour
INKspiration, add the group to your Favourites
and share it with your crafty friends so they can join in the fun too. We'd
love to see what you create with these gorgeous colours! You don't have to have
a Blog to participate but if you do, you can link back to your post.
Just a reminder to use all the Challenge colours. If you
don’t have the colours in our palette, feel free to use the closest Stampin’
Up! substitute - Misty Moonlight for Starry Sky for example. We also
allow Ivory, Bronze and Natural Tones in the Stampin' Blends and Neutrals such
as Basic White, Very Vanilla, Crumb Cake, Basic Black and Metallics.
Thank you so much taking the time to drop in. I hope I have
inspired you and if you like what I have shown or if you have any questions,
please leave them in the comments section below.
Until next time, take care, stay safe and have a great
day!
Monica xx
.
If you live in Australia and would like to purchase any of the products
I have used today, click any of the thumbnail links in the Product List below
or click the 'Shop Online' tab at the top of this page. Both ways will
take you directly to my Stampin' Up! Store, where you are only minutes away
from getting your supplies delivered straight to your door.
If your order is more than $169.00 (before postage), then the best
deal in the Catalogue is to join my Stamping Team.
You can put together a Starter Kit with your choice of products to the
value of $235.00 for only $169.00 with a 20% discount every time you place an
order! No conditions attached! And who knows where you're Stampin' Up!
journey will take you.
Happy to chat if you have any questions about becoming a Demonstrator.
- Product List -
 Large Numbers Framelits Dies [140622] | ||