


Welcome back for Colour INKspiration Challenge #120. The photo for this Challenge has been chosen by our fabulous Crew Member, Rose Packer and the Guest Designer is the lovely Jane Martin.

Picture credit - #ABCmyphoto via Instagram @jenjenjennah
The colours are certainly dramatic and it took me a while to settle on a design - stronger colours throw me a bit. I decided on some watercolouring which has diluted the colours but still allowed for full saturation in places. It also gives a little bit of texure to your images and I love the effect.

Supplies:
- Happiness Abounds Bundle
- Die: Stitched Greenery
- Cardstock: Shimmer White, Pale Papaya, Pumpkin Pie, Basic Black, Basic White (card inner)
- Ink: Memento Tuxedo Black, Gorgeous Grape, Pale Papaya, Poppy Parade, Pumpkin Pie
- Embellishments: Brushed Brass Butterflies, Linen Thread
- Adhesives: Dimensionals, Glue Dots, Tombow Liquid Glue
- Tools: Paper Trimmer, Stamparatus, F Block/Silicon Mat, Stampin' Spritzer, Stampin' Cut & Emboss Machine.
How to Make:
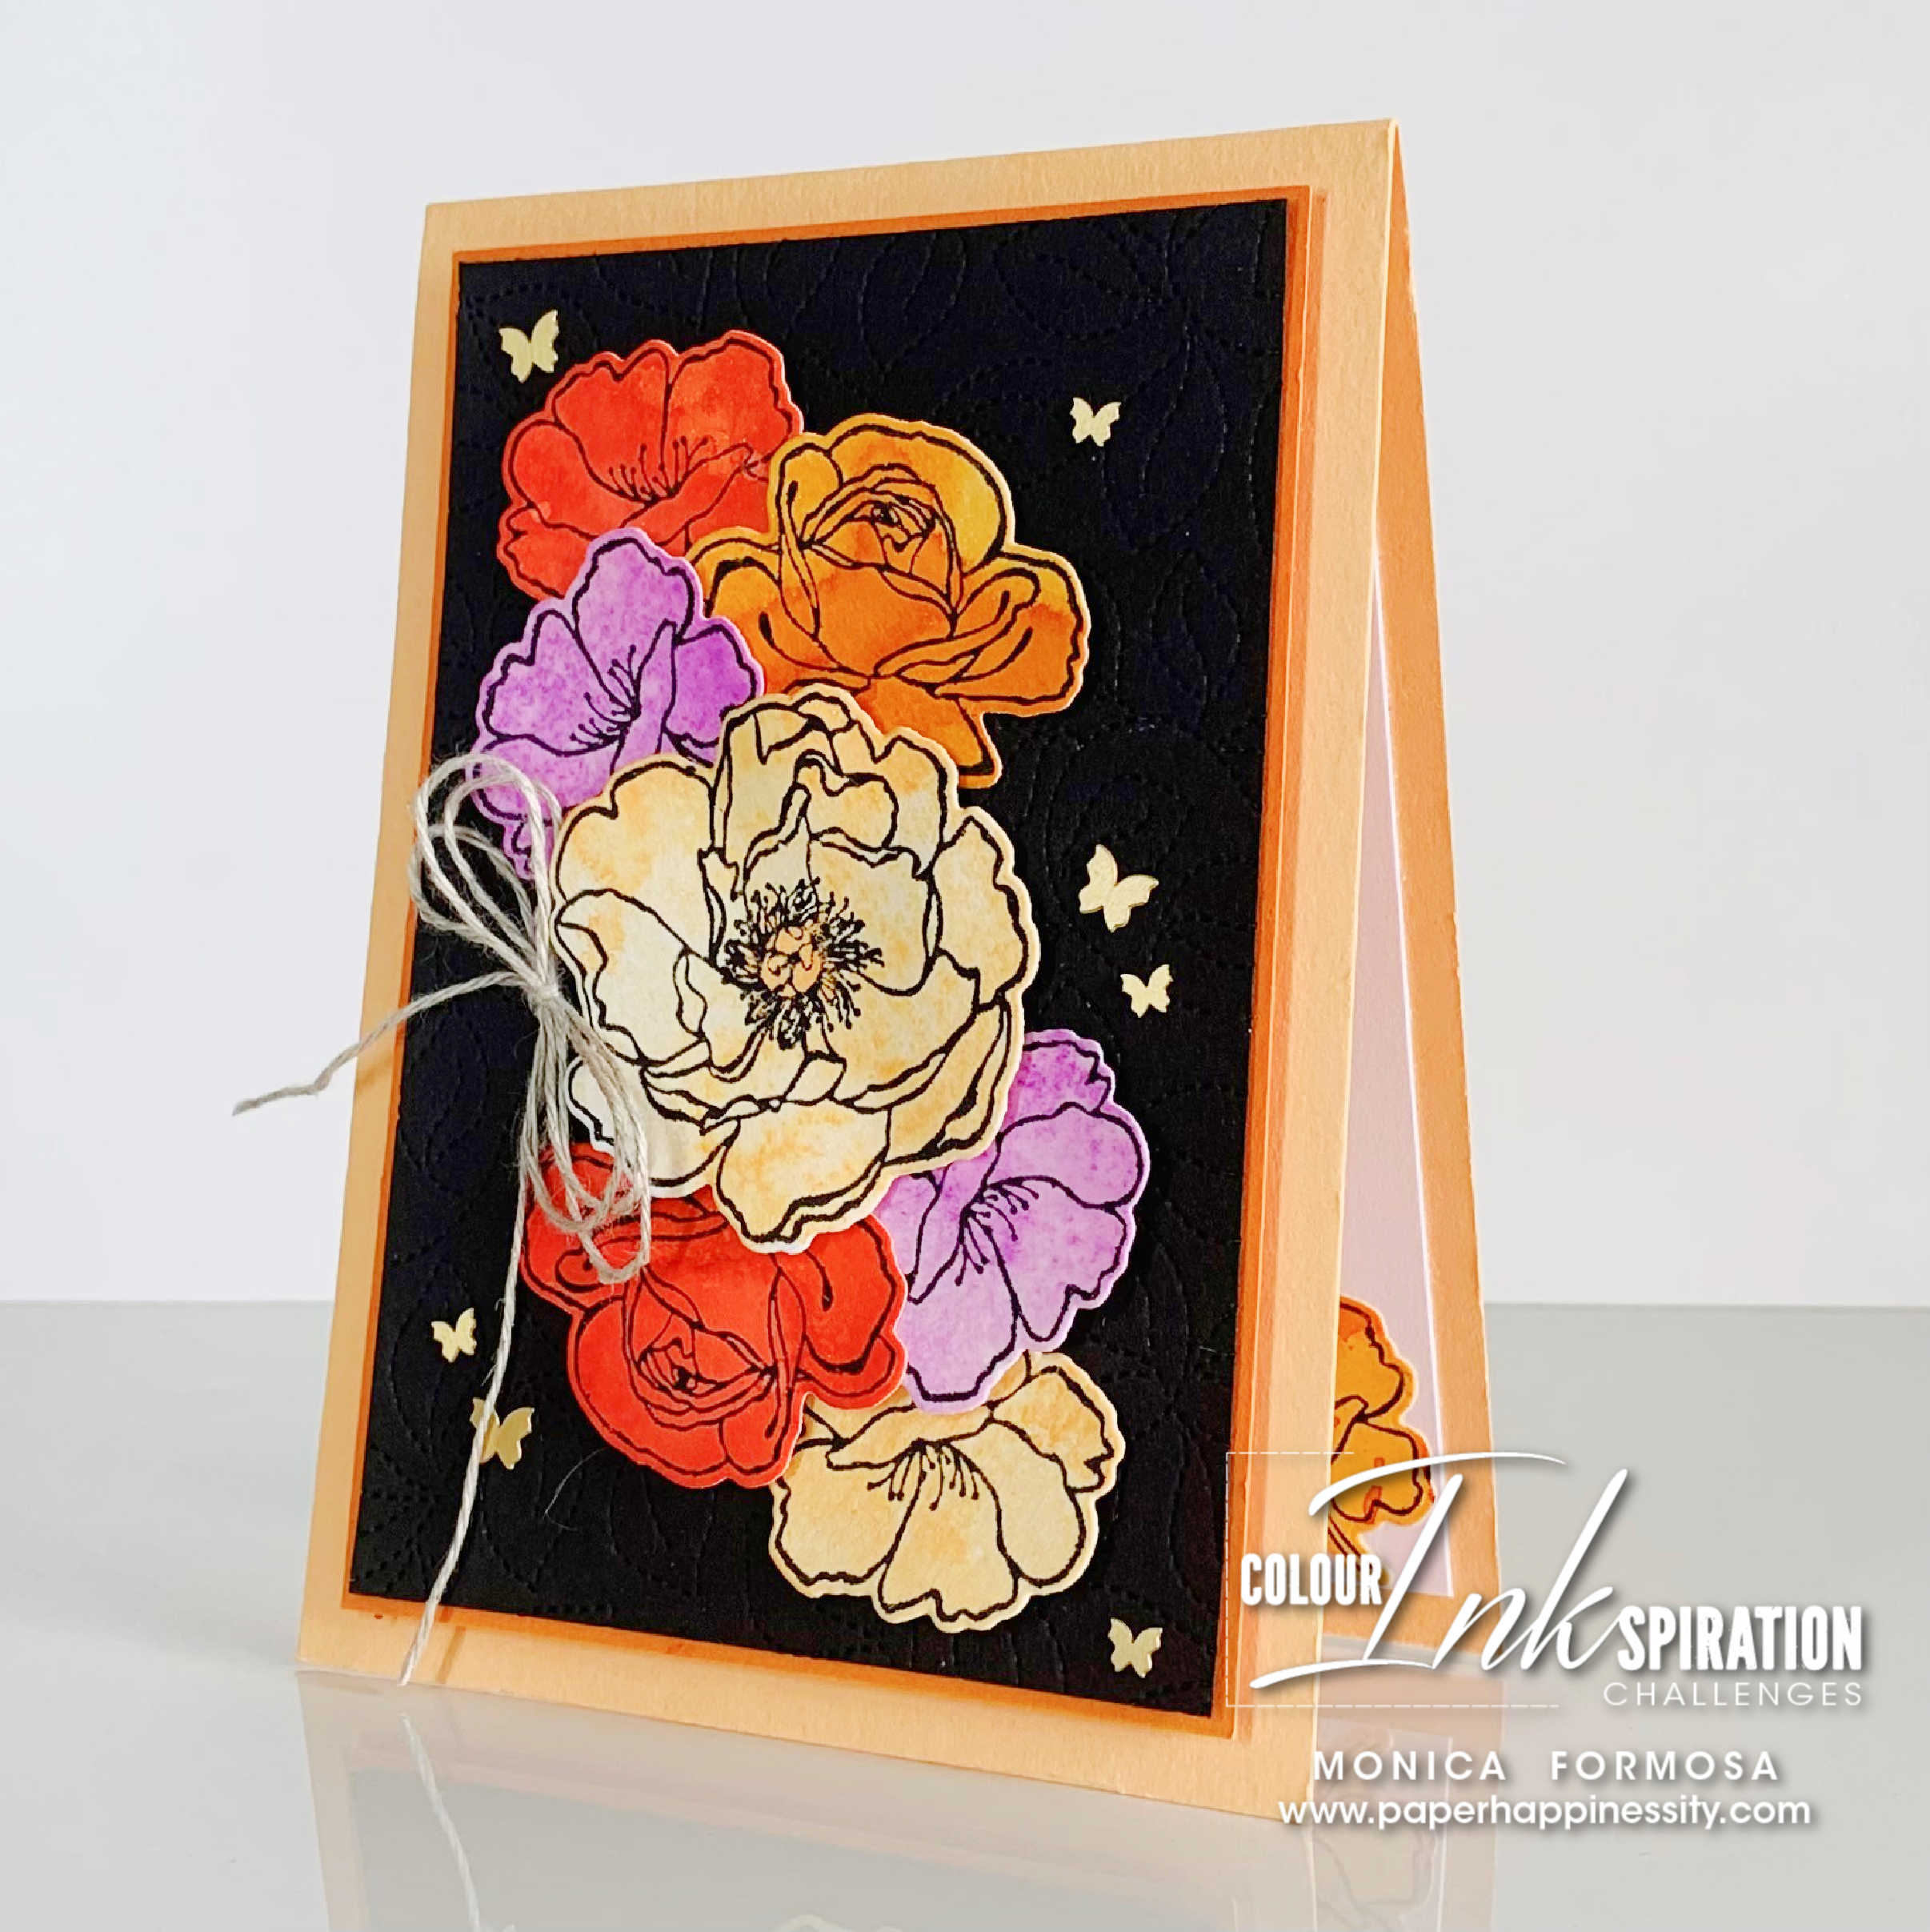
- For this, you will need a card base in Pale Papaya cardstock, a mat layer in Pumpkin Pie cardstock measuring 1/2" less on two sides, a mat layer in Basic Black cardstock measuring 3/4" less on two sides than the card front, a sheet of Shimmery White cardstock trimmed into four pieces.

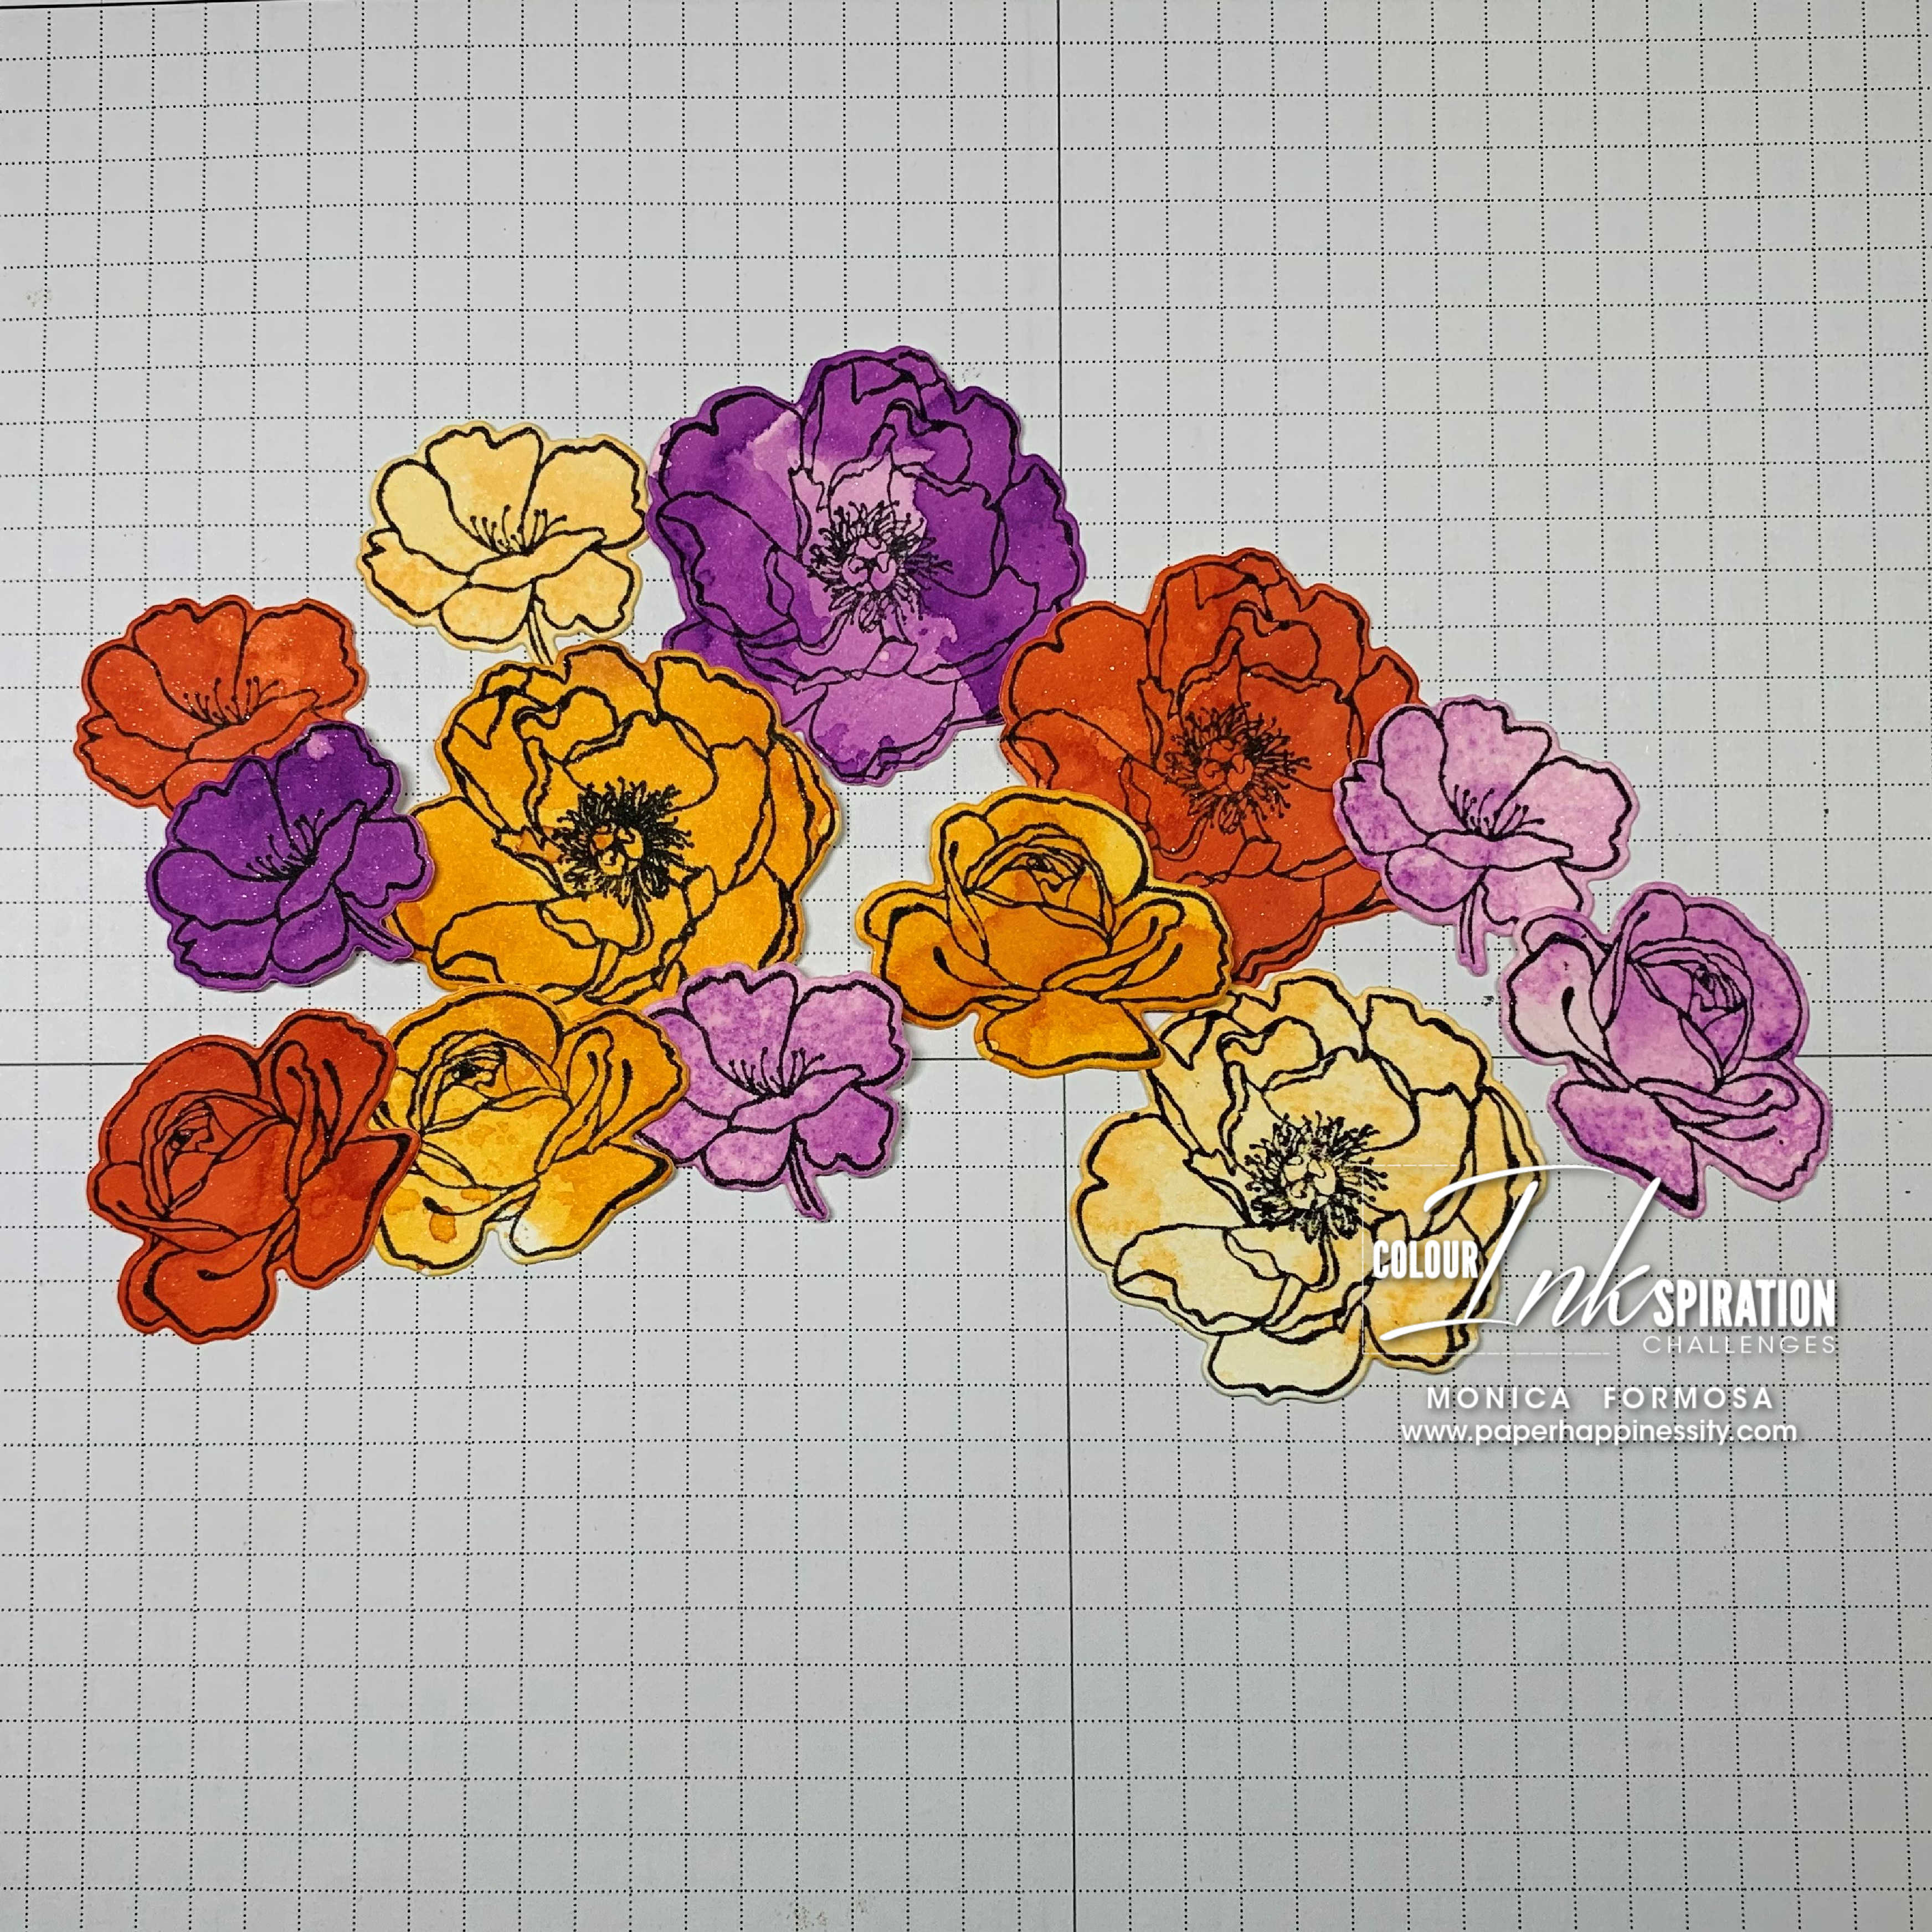
- Apply ink to the Clear Block 'F', sprintz with water and 'smoosh' the cardstock into the mixture. Do this separately for each colour. You can dry this off with a heat tool or you can allow to dry naturally but this needs to be completely dry as the black ink will smudge if it's not.

- Take each of these and stamp your images with Memento Tuxedo Black ink. I recommend using a Stamparatus as you can go back and restamp if your images aren't crisp - sometimes watercoloured cardstock can play havoc and not stamp perfectly the first time, using a Stamparatus will allow you to re-stamp to achieve a better image.
- My original idea was to stamp and clear emboss (shown on the right) but as you can see there's no definition of the image this way

- Die cut each image using the co-ordinating Blooming Happiness Dies. I didn't quite know at this stage what I was planning to do so I made a lot.
- Run the piece of Basic Black cardstock through the Stampin' Cut & Emboss Machine using the Stitched Greenery Die. This gives lovely texture to the background.

- Arrange the floral die-cut images and attach them using Dimensionals.

- Glue this to the Pumpkin Pie mat layer. I recommend using Stampin' Seal as the liquid glue can come through the small stitched details. Attach this to the front of the card using Dimensionals. Add a bow created with the Linen Thread and add a few Brushed Brass Butterflies to complete the front.
- Because I had so many flowers left over, I picked on of the smaller ones and added it to a piece of Basic White cardstock and added this to the inside of the card.


Firstly, hop on over and check out the creations of
the Colour INKspiration Crew in the Challenge album on our Facebook page.
Then you have 12 days from today to make and upload your creation to the Facebook Colour
INKspiration Group. You don't have to have a blog to participate but
if you do, you can link back to your post. Just a reminder to use all the
challenge colours. Neutrals such as Whisper White, Very Vanilla, Crumb Cake,
Sahara Sand and Basic Black are also allowed as well as Metallics.
If you feel inspired, click here and ask to join Colour INKspiration, add the group to your Favourites and share it with your crafty friends so they can join in the fun too. We can't wait to see what you create with these gorgeous colours!
Thank you so much taking the time to drop in. I hope I have inspired you and if you like what I have shown or if you have any questions, please leave them in the comments section below.

.
Product List
")


Love how vibrant and dimensional this card is Mon. x
ReplyDelete