
Hello my crafty friends! Welcome back and thanks for popping in!
This coming Tuesday, we have a new Catalogue release and I want to give you a sneak peak of the new 2022-24 In Colours. Stampin' Up! have four co-ordinating colour collections which are the basis of their product line then to make it exciting every alternate year, we are given five new colours which are available for two years before they get changed out for another five new colours.
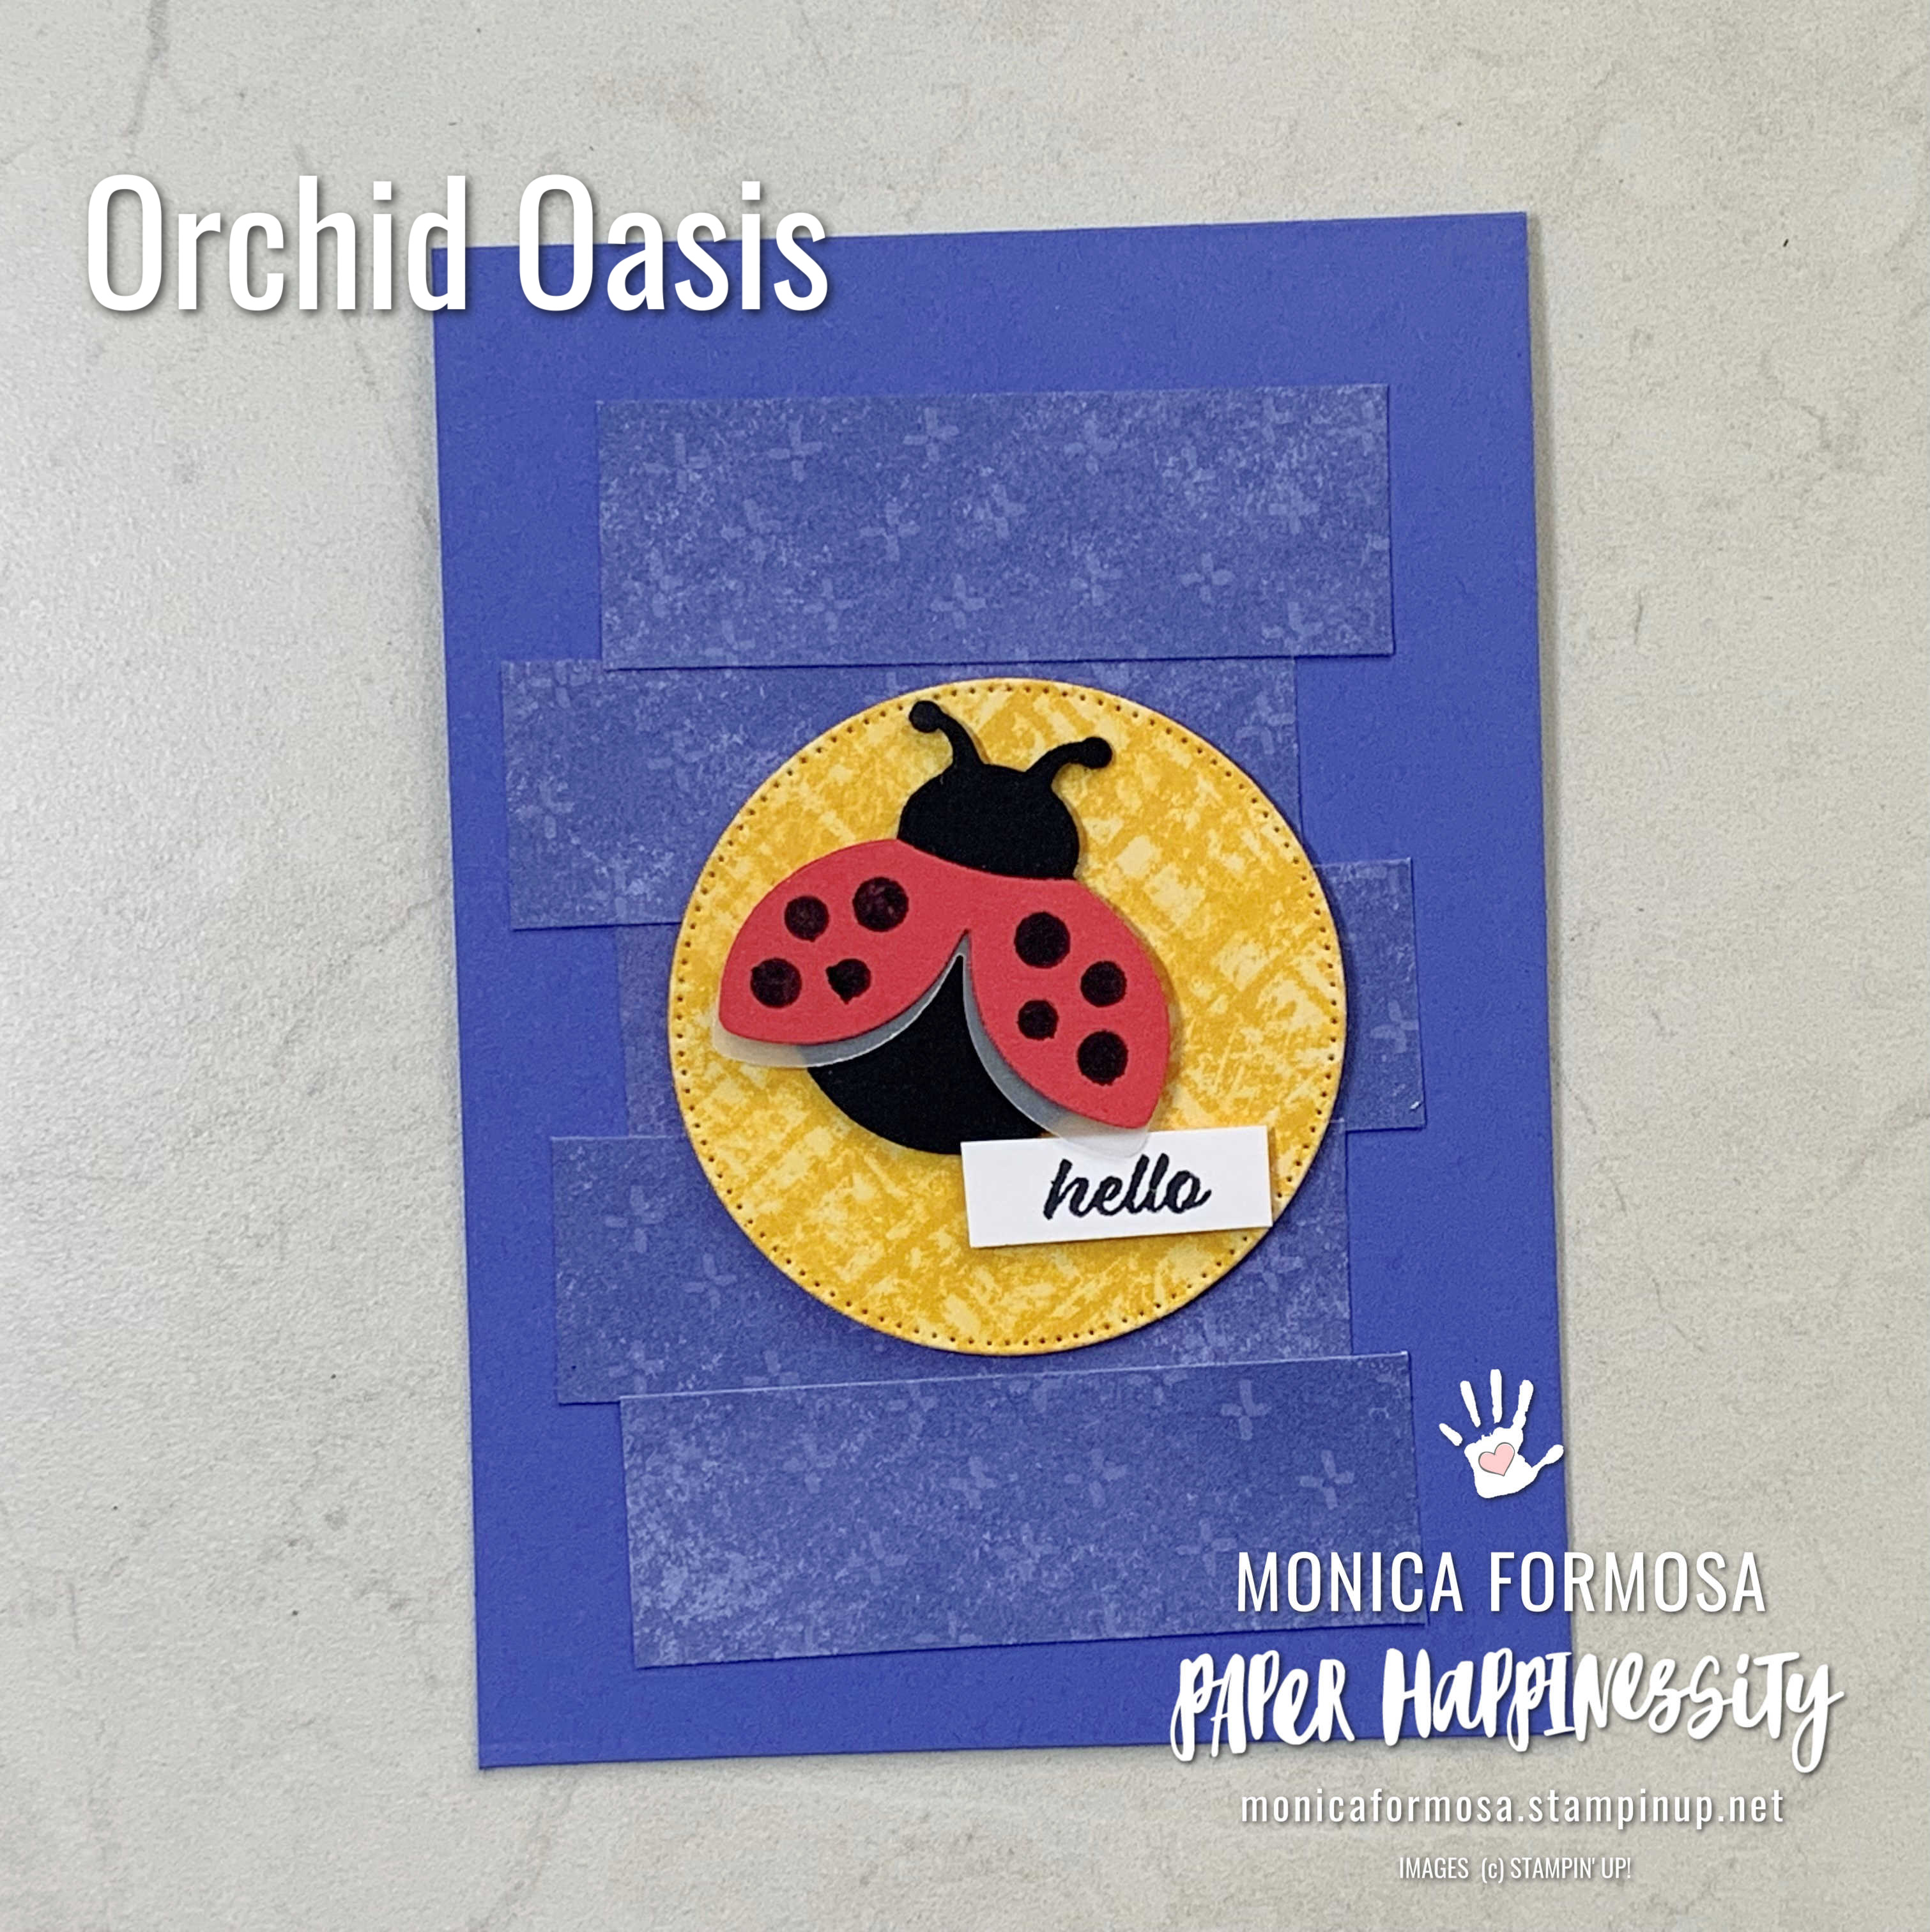
These colours are bright and fun and I can't wait to work with them some more. My cards feature the Hello Ladybug Stamp Set and co-ordinating Ladybug Builder Punch together with the new Styish Shapes Dies. I've teamed these products with the Tea Boutique 6" x 6" Designer Series Paper which just happens to include the colours I'm wanting to show.

My cards were inspired by one I saw featured on Page 30 of the 2022-23 Annual Catalogue.
Supplies:
- Stamp Set: Hello Ladybug
- Punch: Ladybug Builder Punch
- Dies: Stylish Shapes
- Cardstock: 2022-24 In Colour Cardstock Collection, Basic Black, Basic White
- DSP: Tea Boutique 6" x 6", Vellum
- Ink: Memento Tuxedo Black
- Adhesive: Tombow Multipurpose, Dimensionals
- Tools: Paper Trimmer, Mini Stampin' Cut & Emboss Machine
How To Make:
- Punch a lady bug body from Basic Black cardstock, and set of wings in Vellum.
- Stamp the spots on the Sweet Sorbet cardstock in Tuxedo Black ink and punch these out - it's easier to stamp then punch rather than the other way around. Do take note of the direction of the punch and stamp accordingly.
- Glue the Vellum wings under the cardstock ones then glue this to the ladybug body. Attach Dimensionals to the back.
- Trim a sheet of DSP in half then cut down one of these so that you have 5 x 1" x 3" strips.
- Die cut a circle using the second to largest circle die from Stylish Shapes. Attach Dimensionals to the back.
- Stamp your sentiment in Tuxedo Black ink on a strip of Basic White and trim. Add Dimensionals to the back.
- Create a card base in co-ordinating cardstock and glue each strip to the front, starting from the middle and off-setting each strip.
- Attach first the die-cut circle then the ladybug and finally the sentiment.
- Trim a piece of Basic White cardstock to 1/4" less on two sides than your card front. Stamp an image from Hello Ladybug stamp set if you wish and glue this to the inside.
- Add embellishments to the front if you wish.


Thank you so much taking the time to drop in. I hope I have inspired you and if you like what I have shown or if you have any questions, please leave them in the comments section below.

.
Live In Australia? Shop With Me!


No comments:
Post a Comment
Thanks for taking the time to comment - it is really appreciated!