


A new colour challenge has opened up in the Colour INKspiration Facebook Group. If you aren't a member, head on over and ask to join and answer the questions - you'll be inspired by all the fabulous creativity the Crew provides not to mention the other participants. We have some amazing talent! The inspiration photo was chosen by the lovely Bronwyn Eastley and we've been given quite a subdued colour palette to work with. I've also taken the liberty and used Basic White which are well within Challenge Rules. Our Guest Designer is the talented Sarine Zijderveld and I'm really looking forward to seeing what everyone has created.

Picture credit - https://www.pinterest.com.au/pin/29343835064550151/
My card features the Cheerful Daisies Bundle which will launch on 2 May 2023. Yes, Stampin' Up have had daisies in the past but this set has a very realistic feel to it which I love and I can't wait to create with it some more.


- Bundle: Cheerful Daisies
- Dies/Embossing Folders: Stylish Shapes, Elegant Eucalyptus 3D (set of 2)
- Cardstock: Smokey Slate, Soft Succulent, Basic White
- Ink: Versamark
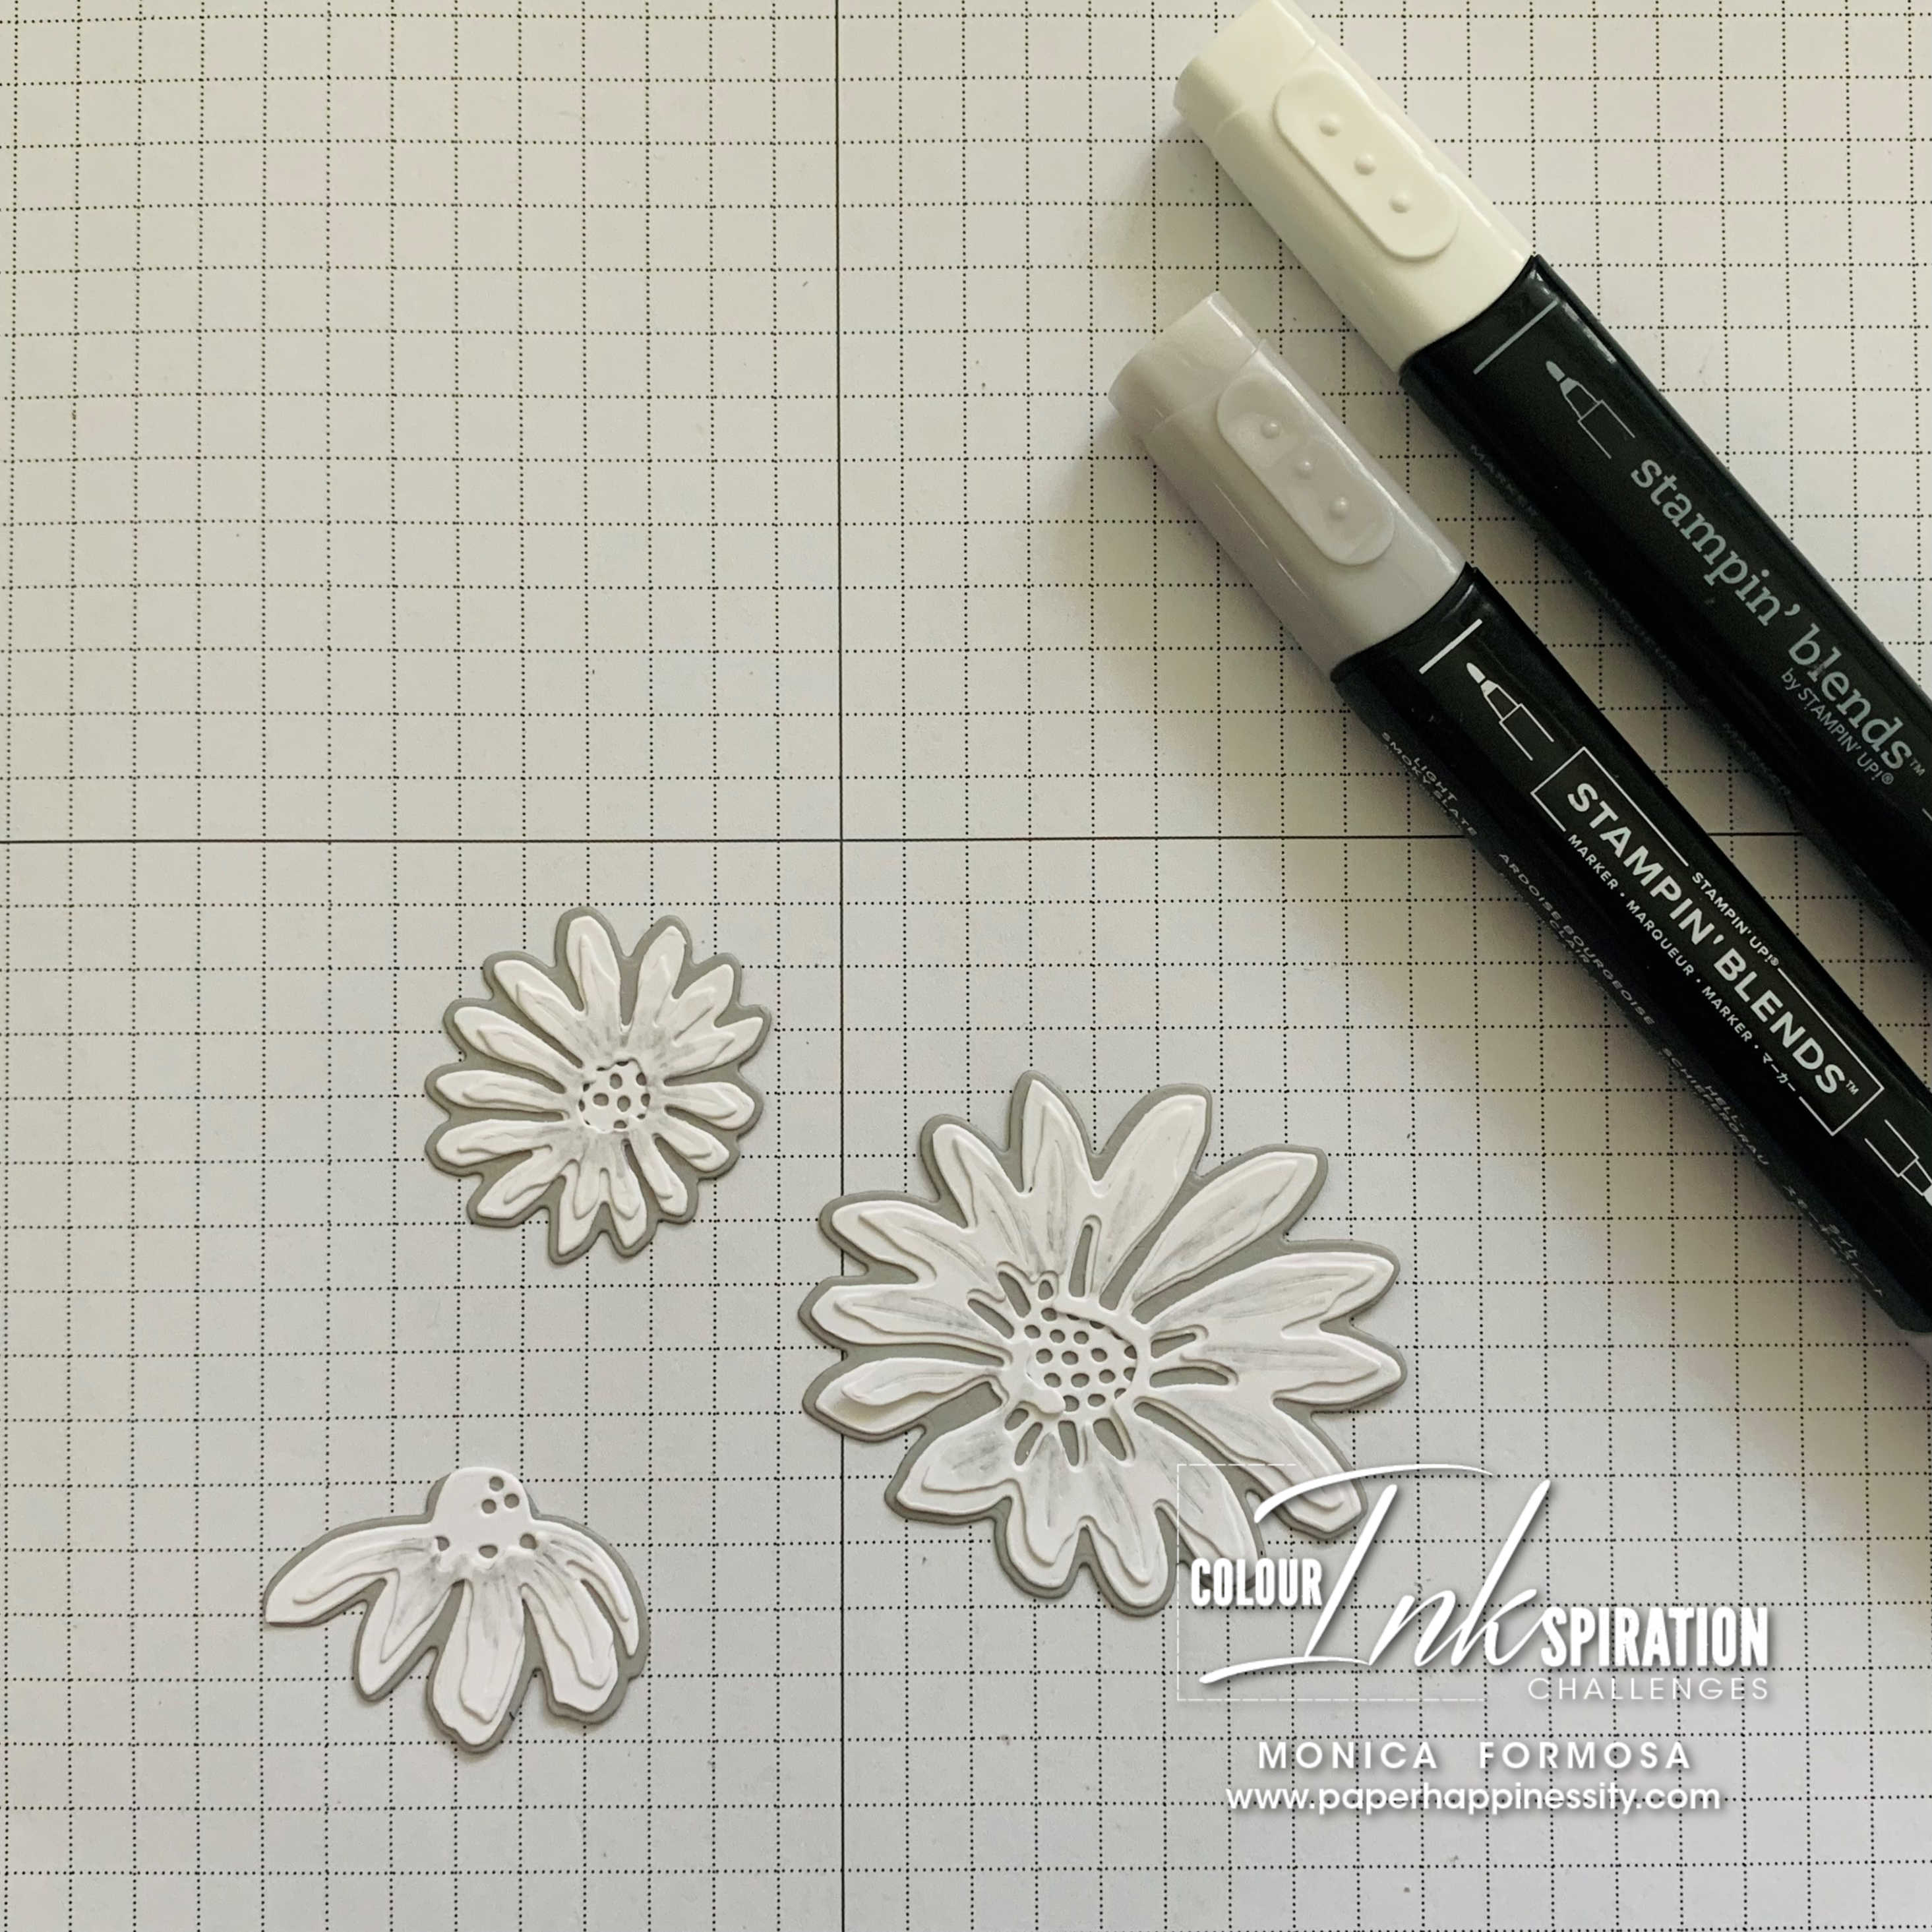
- Colouring Accessories: Basics Embossing Powder, Smoky Slate Stampin' Blends (light), Stampin' Blends Colour Lifter
- Embellishments: Iridescent Rhinestones
- Tools: Paper Trimmer, Stampin' Cut & Emboss Machine, Heat Tool, Blending Brushes
- Adhesives: Tombow Luquid Glue, Dimensionals
- Run a piece of Soft Succulent cardstock measuring 1/2" (1cm) smaller than the card front on two sides through the Cut & Emboss Machine with one of the Elegant Eucalyptus 3D Embossing Folders to add more texture to the background. and mat this onto a piece of Basic White cardstock allowing a tiny 1/16" (0.5cm) border on all four sides.
- Attach this to a Smoky Slate card base using Dimensionals.
- Die cut three twigs in Shaded Spruce cardstock. Very gently blend Shaded Spruce ink into the ends of each one using a Blending Brush.
- Die cut Basic White and Smoky Slate pieces as shown in the photo below. Trim the larger one to separate the three flowers and layer and glue each flower starting with the Smoky Slate at the bottom.


- On the top Basic White layer, use the light Smoky Slate Stampin' Blend to add a small lines of colour to the petals and blend out with the Colour Lifter.
- Arrange the die-cuts on the card front and adhere. Only the largest flower has been raised with Dimensionals.
- Stamp your sentiment in Versmark Ink and heat emboss in white. Die-cut using the third-to-smallest circle die from Stylish Shapes Dies. Add a few Dimensionals to the bottom section and a drop of liquid Tombow to the upper and attach.
- Add a few Iridescent Rhinestones to complete the front.
- To finish the inside, I've added a piece of Basic White trimmed to allow a small 1/8" (0.5cm) border on all four sides.


Firstly, hop on over and check out the creations of the Colour
INKspiration Crew in the Challenge album on our Facebook page. Then you have 12
days from today to make and upload your creation to the Facebook Colour
INKspiration Group. You don't have to have a blog to participate but if you do, you can
link back to your post. Just a reminder to use all the challenge colours.
Neutrals such as Basic White, Very Vanilla, Crumb Cake, Sahara Sand and Basic
Black are also allowed as well as Metallics.
If you feel inspired, click here and ask to
join Colour INKspiration, add the group to
your Favourites and share it with your crafty friends so they can join in the
fun too. We can't wait to see what you create with these lovely colours!
Thank you so much taking the time to drop in. I hope I have inspired you
and if you like what I have shown or if you have any questions, please leave
them in the comments section below.
Until next time, take care, stay safe and have a great day!
Monica xx
.
If you live in Australia and would like
to purchase any of the products I've used today, click any of the thumbnail
links in the Product List below or click the 'Shop Online' tab at the top of
this page. Both ways will get you directly to my Online Store, where you
are only minutes away from getting products delivered straight to your door.
Or maybe you have a wish list as long
as your arm? If so, the best deal in the catalogue is to join my Stamping
Queens Stamping Team.
You can put together a Starter Kit with
your choice of products to the value of $235.00 for only $169.00 with a 20%
discount every time you place an order! No conditions attached! The added bonus
is that you might like to start your own little stamping business.
 |
| JOIN MY TEAM |


No comments:
Post a Comment
Thanks for taking the time to comment - it is really appreciated!